Category Archives: Exterior Storage & Service Compartments

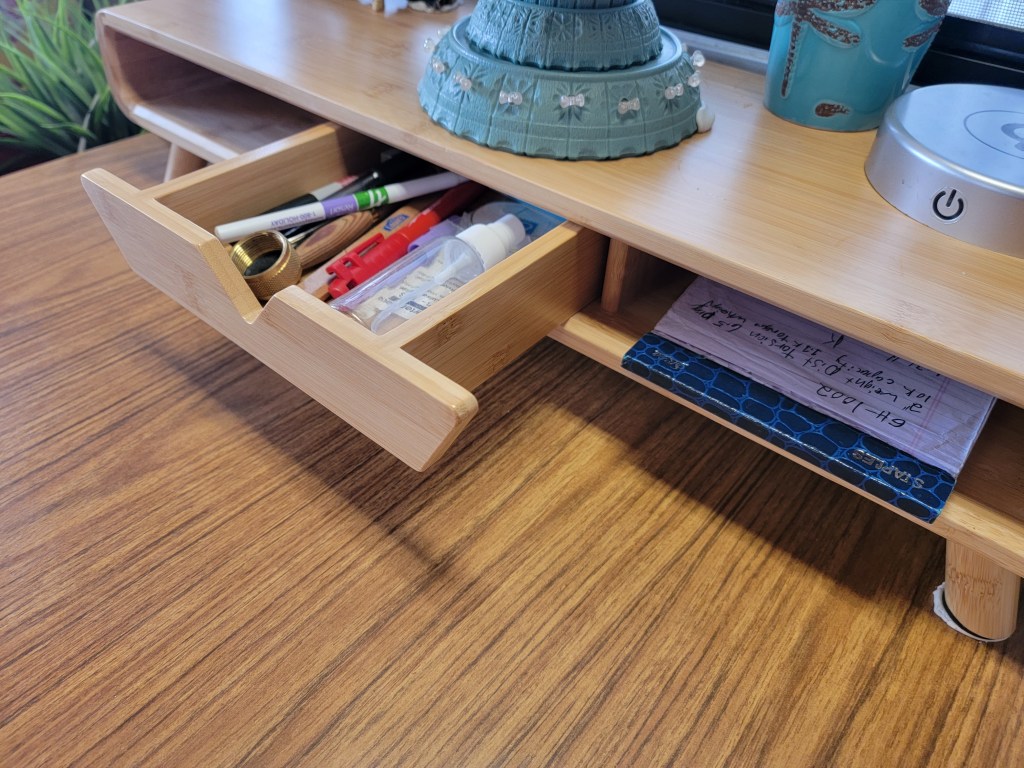
I Put it Somewhere….but Where is it? Tips for Organizing in Small Spaces

As many of you now know Kevin and I are striking out on our full time Avion life adventure in just a couple months. Your probably tired of seeing my periodic “days to go” count down on our Facebook Page! (Thanks for not complaining out loud!)

In this blog post I am going to cover:

  • The basics of downsizing
  • Methods and questions to use to help the process
  • Organizing Tips for small spaces
  • Real life examples/photos of what we found works well
  • How to find stuff after you have done such a great job organizing
  • The benefits you reap!

Getting Organized and finding places for everything we need (or think we are going to need) is getting really tough. FYI—Weekend, Week long or even month long trips are nothing like figuring how to move your entire household onto a rolling 32 by 8 foot tube of aluminum!

We ascribe to the adage that everything needs a place and that “place” becomes its “home” and after each use..it goes back there. No longer can you use a kitchen item and leave it on the countertop, use a tool and leave it on the coffee table (what coffee table??) or leave pairs of shoes or slippers lying by the sofa or door (yes, you know who I am talking about don’t you!)

So I have come up with some handy tricks/tips/steps to help with this process of our final downsizing. I think that these tricks/tips/steps can HELP YOU even if you are a weekend warrior camper, a few week traveler or…like us…full timers (or wannabees down the road).

BUT FIRST….SOME BASICS:

Don’t kid yourself!!! Downsizing takes work, it takes time, it takes hard-core REPEATED evaluation of you real needs & wants, things you covet beyond reason and….Yup! time for that item to go to someone else’s home–or into the trash bin!

I love the Marie Kondo’s KonMari Method of tidying and simplifying your lifestyle and your home & personal possessions– “stuff”. I have read her original Tidying book (twice) and listened to it on Audible twice now too. It has sunk in…but its still not easy. In essence she has you ask basic questions and below I have tweaked it for my own use….and share with you….

  • Relative to how many people are in your household…how many (insert word here like…coffee mugs) do you need? How many do you use daily? weekly? If you are like me…you have ONE favorite china one, and one favorite travel mug. Pass along your extras via donations, gifts, etc. to others who may need them more.
  • Does it bring you joy? Are there things in your closet, on your mantle, on a wall shelf that simply evoke sense of deep joy when you look at them? touch them or use them? Do they hold such sentimental value that without them you would not feel whole or connected to your family, your past or where you have been through your life journey? Then keep them (at least for now) and bring them along on your future journey or ask a family member or trusted friend to keep them safe for you.
  • Create your must haves from your closet based on clothes you wear routinely, that you feel good wearing, that are more classic in styling and can be layered depending on seasonal temperatures. This is your A pile. I started separating them out 4 seasons ago in a separate place in my closet so I know exactly who they are now! Now move onto your B pile—the occasional or seasonal clothing/shoe/coat items. Pare these down- you do not need 3 winter coats and 4 pair of boots! Finally, the C pile...you bought “cause it looked good (or fit)”at the time-but not so much anymore, or you wore it to one event and it now has dust on the hanger…you know what i mean! My closet was full of them too! Go through each pile again…be honest, use that repeated evaluation mode and weed out more. I am on about mode #8. Donate these items or sell them if they still have some value. By doing this you send those un-needed items to a new home where they can bring joy (or warmth) to someone who really could use them. No item likes to be left forgotten in a closet or cupboard- they want to be used!

TIPS FOR SMALL SPACES:

  • Watch a Marie Kondo video on how to properly fold items before putting them in drawers or totes. It really does work!
  • Overhead cabinets for clothing or kitchen soft goods like dish towels, pot holders, cloth napkins are great, but using soft sided storage cubes or plastic shoe boxes helps to keep things organized and in place. In truth, overly heavy object should NOT be put in overhead cabinets (the airlines knows what they are talking about here!) you could risk the cabinet pulling away from the wall supports at some point if heavy items are bouncing around as you roll down the road-or may simply be heavy enough to push open the cabinet and fall on the floor during travel.
  • Especially for the kitchen, select items that have multiple uses! Like the collapsible food storage container that doubles as a salad or ice cream bowl or when mixing up pancake batter. The roll up dish drying rack that doubles as extra counter space overtop the sink. We have links to many awesome products here on our “Amazon Fav List”, (just a list of things we like and use).
  • Bathrooms are WAY smaller than in a “sticks n bricks”. Medicine cabinets are small with short heights for items. Purchase travel size or small size of bottled items first and refill them as needed from larger more cost conscious size bottles you store under the sink. This will mean less dragging the big bottles out from under the deep recesses of your bathroom sink cabinet!
  • Use the clothing rod in your shower to hang bathrobes and jackets you may use nearly every day. Most of us RVing do not shower every day due to the amount of water it uses- we do a “bird bath” in-between shower days with baby wipes or similar cleansing cloths.
  • If you don’t already have a shelf behind your sofa that sits down about 8 or 9″–make one! It does not impede the jack knife feature. We utilize this space fully (90″ long by 7″ wide) for things like our TV remotes, Thermacell lantern and refills, binoculars, flashlights, small solar powered puck lights and more! (see what we use to hold them below!)
  • We raised up our original Avion jack knife sofa by 6 inches to gain very valuable storage space underneath our sofa. Yes, we needed to make a new sofa skirt to hide stuff underneath but that was a small price to pay for DOUBLING our under sofa storage. We used 2by4 blocks 2 stacked on top of each other, bolted to the floor then the frame of the sofa bolted to the blocks. Here is the link to that project-LINK

USEFUL ITEMS- DESCRIPTIONS, PICTURES AND WHERE TO GET!

Below are photos of items we have found to be super useful. In most instances they can be found on our Amazon FAV list. This is not a store we get a residual from, its merely our list of items we have used and liked and want to share. The album below shows the items. Underneath the album I have indicated where we have purchased some of the items (when I can recall where)

  • Plexiglas Magazine Holders: for under kitchen cabinet cleaning supplies were purchased through The Container Store-LINK
  • Wire framed, and/or fabric covered bins were purchased at Bed, Bath & Beyond but can also be found at many retail stores. SOFT sided ones work best for overhead cabinets due to the curve of the roof line.
  • Fold down counter extension (in our ’73) was the top of a TV tray from Walmart
  • Assorted lidded shoe bins and plastic storage bins under sofa are from Lowes/Home Depot and Walmart
  • for the following items, refer to links in our Amazon FAV list:
    • Rollup Dish Drainer
      • Collapsible food storage/prep containers
        • Grey lift top ottoman (is collapsible too)

HOW TO FIND STUFF AFTER YOU HAVE TUCKED IT AWAY IN A GREAT STORAGE PLACE!

We have all been there. You put something away and now its in a bin, closet drawer or somewhere you cannot find it!  right?!!

OUTSIDE: We have done inventory sheets on our exterior “basement” storage areas. Everything goes back in the same place after each use. Remember they can only hold up to 25lbs each on an Avion! These bays are not waterproof- so anything you put in there should be able to stand getting wet. We do use some heavy duty shrink style bags for some gear and they have worked against wind, mud and weather conditions. The storage bins behind the tires are the most apt to get wet!

In our truck “Merlin” We also utilize a DECKED drawer system in the bed of our truck for quick reach of all tools needed, auto supplies, etc. We then do a paper inventory and label each storage bin we have in the extended high cap of our truck. And we created a master list of where each one is placed in the bed–no fishing around and having to take it all out each time to find 1 thing we need! see our Facebook page for a whole post on this!

INSIDE THE TRAILER: Here are some tips on how I have found to help with that!  You may notice some are repeats from our slide show above but you may have missed something!

Fabric/Soft sided Bins 

I hang a spare key fob off the handle and write inventory on each fob

more….

I use green painters tape and write contents on outside of each bin. This helps Kevin put stuff back where it belongs too!

Hard to see into drawers!

We have this cupboard between our living room and hallway that has 3 pull out drawers. Each can hold up to 40 lbs per the original sticker. The top drawer is very high, above eye level and you cannot see into it so I put green tape on the metal outside facing forward so when the drawer is pulled out, you can see what gets stored in there! Works like a charm so I actually did it for each of the 3 drawers so Kevin also knows where to find what!

WHAT IS IN IT FOR YOU? I can honestly say our downsizing journey has had the resulting feel of heavy burdens being lifted off our shoulders. We actually sold a lot of stuff on ebay and Facebook Marketplace, especially our other hobby gear and made enough to pay for some of our Avion upgrades in the process.

Life is simpler, closets and cupboards are less full….but our life just gets more fulfilling! Here’s to happy trails and beautiful sunsets!

If you have not already subscribed to our blog and YouTube channel please do! We really appreciate it and your comments! Let us know topics you would like to see in the future!

AVION Trailer- New Black Tank Installation, 2022-Tips, Sources and more!

OLD on the left….NEW from Pelland Enterprises on the right

A little background to this story.…..In the summer of 2021 our original black tank had a major failure- sadly solely by human error. We had inadvertently threw “on” the tank warmer fuse during our MORryde install. The PO had not installed a heat override- so if you install tank warmers please also install that auto sensor override. The tank was empty and ended up frying itself and tearing substantial cracks in several areas of the bottom. Hard lesson learned. We thought we had solved the problem when we found a highly rated RV repair shop about an hour from us who specialized in plastic welding, repairing all sorts of “plastic issues” with RVs. He looked at the tank and felt sure he could repair it. We had been told by many that it was near impossible to find tank replacements, some had tried their own repairs to no avail and we even contemplated going with a composting toilet instead (in the end…nope not for us!) So…. 3-weeks and $600+ later, the multi-layer repair looked and worked awesomely. We were all set!! Needless to say removing a black tank and replacing a black tank is not for the fainthearted. We are eternally grateful we have a nice concrete floored garage to work in and higher ground clearance thanks to our MORryde Independent Suspension system install. We did successful camping trips in August and September- all systems were GO! The black tank was working just fine! For more about our original project click here.

FAST FORWARD TO JULY 2022

At the very last official stop on our 5-week RV trip through 7 states in June/July of 2022 we were at our last campground, Campfire Lodgings outside of Ashville, NC and atop a huge mountain! Lo and behold, we saw a slow leak coming out onto the beautiful concrete slab RV pad. We had a 3 day stay here so we quickly hooked up our sewer hose and kept the bayonet valve open (we normally never do this!) so that any liquids would go out to the sewer rather than drip. That did a pretty good job but we also used the campground bathrooms during the day and as much as possible (we were in bear country so I was not going to go out to walk to the bath house for my nature call at 2 AM!). We allowed the tank to dry out and the leaking stopped. TIP: In a pinch we turned off the water feed to our toilet and lined our toilet with boondocking camp toilet liner bags and improvised for the 2 day drive home when needed. These are easy enough to dispose of at rest area dumpsters.

The good, the bad…and the downright ugly!

Once back to our home RV storage barn garage we took to task removing the old (repaired) tank. These tanks come out a lot easier than they go in. We have found the toughest part is getting the discharge piping lined up and the bayonet valves in place. Those valves are actually the toughest to do- you need five pairs of hands and only have room for 1 pair in that outside compartment.

Steps to remove your black tank:

In our 1987, 32S we have a mid-bath. This means that our black tank is also under the area where our REAR Stabilizers are. These must be removed first.

PREP: Before beginning this project, if your tank has been used somewhat recently and may not be completely dried out we recommend using a Camco toilet and tank washing wand (we actually do this routinely at least 2-3 times per year when RVing part time. We will do it more frequently once we go full time). by hooking up a garden hose (not your fresh water hose) and using this pressure washing system through your toilet by holding the foot pedal down. They also make some that have a sink attachment end on a short hose. Extend the wand end down right into the tank and rotate it around all sides of the tank as much as possible. Hook up your sewer hose to drain out tank. We did this multiple times ensuring we had removed as much as we could.

  • Remove the belly pans underneath your black tank area. *TIP: be sure to label each of them on the underside first so you can easily see how they go back in. Sometimes you feel like you are working with a jigsaw puzzle.
  • Remove any insulation (ours has sheets of foam insulation bats all over the length of the trailer put in by a PO.)
  • Disconnect sewerage discharge pipe at the black tank opening. Keep rest of discharge piping from the elbow and as it goes through to the bayonet valve in the wet bay area.
  • Disconnect the vent stack connection (our 32S it is in the corner of the cabinet near the furnace)
  • Disconnect toilet and remove bolts and flange (should screw off with some force used)
  • once all pipes have been disconnected….
  • Unbolt the steel “L” channel that runs along the rear side of the black tank and holds it snugly to the front brace.
  • Remove tank slowly maneuvering it out of its location pulling down.

SOURCE FOR NEW BLACK TANKS: We were very fortunate that we were given a great tip from Chuck Cayo (recognized as a national guru on all things Avion. His family started the Avion Corp back in the day). Chuck suggested we call Pelland Enterprises. Their website is quite extensive and we were able to find the perfect replacement for our needs. The new tank is slightly smaller (shorter in length) than our original so holds perhaps a couple gallons less but the other dimensions were perfect including the location of the main discharge hole and width and height that would fit into our original location. If you have a 32S feel free to contact us for our exact model we ordered. Different trailer models and lengths will have different size needs.

https://www.pellandent.com/RV-Holding-Tanks

Here is a diagram we made to show Pelland Enterprises exactly where we needed them to spin weld in (best way to do) the opening for our vent stack and for our toilet opening. They will do this step but be sure your measurements are clear and exact because all tanks are not returnable! We uploaded tons of photos and these drawings to them via email. Also note, it takes approximately a minimum of 6-8 weeks for delivery.

These are the waste level sensors on our old tank. If you want, Pelland will also spin weld in new connections on a new tank too. Again, make sure your diagrams are precise with measurements. BTW…we never trust the sensors! In the black tank, since it can be seen when opening/flushing the toilet we monitor the black tank levels by eye.

Once we received our new black tank, it was time for installation. Basically we reinstalled going in the reverse of our above steps.  Thankfully we were able to do the pipe hook ups relatively easy this time.  Once the pipes were reinstalled, we tested the tank and the connections by filling the tank with water thru the toilet pipe opening in the bathroom floor.  Kevin opened the bayonet valve to discharge the black tank and we watched for any signs of leaks.  All went super well.  Ditto for the grey tank with similar testing to ensure no leaks in the reconnected pipes and the bayonet valves.

At the instruction from Chuck Cayo we went ahead and once again installed a marine plywood board (coated several times with a marine epoxy resin “West System*” on all sides and edges) and positioned it in place covering the entire tank bottom, and extending about a 1 inch on the rear edge.  This board we strapped in with metal L brackets held in place to the frame pieces with self riveting screws. We have the some of these products we used listed on our Amazon Favorites list on our Resources & Links page on our website.  TIP:  Per Mr. Cayo and our own experience, it is VERY IMPORTANT to put a large board under all of your tanks to support them.  Only metal strapping is not enough-even if you never travel with stuff in your tanks.

Once the pipes were all reinstalled we purchased 2″ R-10 Styrofoam insulation boards (pink) at Home Depot and cut them precisely to fit around the tank and rest of underbelly area.  See photos below.

BUTTONING UP THE BELLY PAN:  Once all of the layers of insulation were put in place, Kevin re-screwed in (stainless self taping screws and in some places, rivets) the belly pan sections.  We have actually created a drawing showing how ours goes together including which panel goes under a neighboring one when installing.  The copper gas line was installed back in place outside the belly pan area with some rubber lined clamps screwed into the aluminum pan sheets.  Reminder, the gas line, by law must always be on the outside!

WET BAY FINISHING UP TIPS: Then we applied a spray in sealant foam (pest retardant type) around the openings where the grey and discharge black tank pipes come through the wet bay wall aluminum.  This helps to keep rodents from accessing into the belly pan area. TIP: Be sure NOT to get this anywhere near the bayonet valve areas themselves.  Also, while in this area, Kevin applied lubricant to the steal rods in the bayonet valves themselves.  The best lubricant to use here is dry silicone spray and prime the rod pushing the handle in and out several times.

TOILET REINSTALL:  once all the underbelly work was done we reinstalled the toilet.  This was also a great time to do a deep clean of the toilet’s main discharge shoot from the bottom up to the under side of the ball valve (the thing that opens and shuts during flushing).  Not a fun job but good to do when the toilet is uninstalled and then applying dry silicone gel around the toilet ball valve and replace all gaskets and seals. We also took many photos of the manufacturers labels and ordered back up parts while they are still available and we will have them on the road should a failure of some part happen. All were found on Amazon. Our toilet is Thetford Aqua Magic Plus II, porcelain bowl. The “plastic skirt” that wraps around the base is not shown in this photo

WHILE WE WERE AT IT WE ADDED A NEW FEATURE!: Since the toilet was off we also took advantage and ordered the spray hose with handle accessory and installed that before reinstalling the toilet itself. TIP– on our previous post and videos about our replumbing with PE piping we showed how we installed a shut off valve on the toilet water intake hose just to the left of the toilet base. This made removal of the toilet or any work needing to be done to it far easier than having to turn off all your water in the rig.

We hope this article may help you with some tips, or if you ever need to replace YOUR black tank. We sincerely hope that day will never come though!

If you found this article helpful please drop us a comment!

Be well and safe journeys! Kevin & Luise

RV Fresh Water Hook up Safety Tips

The Good, The Bad…the Ugly!  It may not be the most glamorous topic for discussion, but keeping you and your family healthy has a direct correlation to continued enjoyment of the RV travel hobby.

The UGLY! Cross contamination of the fresh water spigot tap can cause serious illness—and contamination of your entire fresh water system!  It can happen very easily, without your knowledge or even innocently on your part and it DOES happen!

Here are just a few possible CAUSES OF CONTAMINATION to your fresh water tank:

HOW DOES CONTAMINATION OF FRESH WATER HAPPEN?

Campground issues…..these are out of your control!

  • Campgrounds are not regularly testing their potable water supply (yes, it happens*)
  • Local municipal contamination, causing an emergency “boil water” advisory- especially prevalent after major storms.
  • Fresh water pipes could be broken underground before they get to spigot.
  • Improper placement of fresh water spigots by campground ownership

AND THE BIGGEST/MOST COMMON REASON??  Fresh water spigot tap contamination from a previous camper!

What YOU and OTHER CAMPERS do DOES makes a difference!

  1. Lack of proper procedures during their black water tank flush process
  2. Improper series/order of steps when hooking up or breaking down camp- we have seen people cleaning/rinsing their septic hose by turning on the fresh water spigot and rinsing under the water flow.  Do you have any idea how much bacteria is splashing back up on to that faucet outlet??
  3. Improper storage of your fresh water and sewer hoses
  4. Broken, cracked, frayed hoses or couplers on hoses

There are countless conversations on facebook, YouTube and other blogs about first hand witnessing of unsanitary (for you and them) practices or lack thereof.  This is serious business, ecoli infections can kill someone!

TIPS TO BE MORE SAFE WHEN USING CAMPGROUND DUMP STATIONS AND FULL HOOK UP SITES:

  1. Always wear clean disposable gloves when doing your sewer dumping and DO NOT leave those gloves anywhere but in your own trash bag!
  2. Put a small spray bottle of H2O with a mild bleach solution in your outside fresh water compartment. I bought a 4 inch travel size one with spritzer nozzle at Wally World for a couple of $.
  3. Spray your bleach water solution EACH and every time you hook up and break down!  Spray it on…both ends of your fresh water hose, the spigot at the campground pedestal/faucet before you hook up your hose.  Spray the ends of your fresh water filter(s) too.  When spraying spray around the outside and into the openings of hoses, filters, and spigot.
  4. NEVER set the open ends of  your fresh water hoses or filter ends on the ground!! NEVER NEVER! Have a helper hold them.   If you must set stuff down because you are alone, then take a clean new plastic kitchen garbage bag and put that on the ground near the water spigot and lay your items on it like a carpet.  Throw bag away after use.
  5. DO NOT store your water filters  in your basement storage areas. (may be ok for modern campers with large storage areas where you can have lidded plastic totes)  Way too much dirt, germs and debris can find their way into them.  We store ours in a clean dish pan in our shower floor or kitchen sink.
  6. If the weather has been wet, use a paper towel or sponge to slide down the length of the fresh water hose before storing to take off mud, dirt, bugs, etc.  Be sure you get all or 99% of the water out of your hoses before storing.
  7. Always screw the two ends of  your fresh water hose together so nothing can get in there while not in use.  Would not hurt to again spray with the water/bleach solution before storing.
  8. Using your water/bleach spritzer spray off your dump valves regularly.  Keep them properly greased/lubed up as directed by manufacturers recommendations.  Keep your storage bays as clean as possible.  
  9. Store your “stinky slinky”, septic hose in a separate area from your fresh water hose and equipment.
  10. Have a box of gloves, a bucket of clorox wipes and paper towels always handy in that basement bay or next one over.
  11. Consider always carrying a gerry jug (we have two 6 gals) with you filled with fresh water you know you can trust.  Just in case the water from your campsite smells a little off, has high iron or sulfur content even though it may be potable.  Your AM coffee will thank you!
  12. Install an under counter fresh water filter below your faucet.  There are many types from electronic to flow through traditional. We have one on our dedicated drinking water faucet.  It is so good it even removed the pink dye color from the winter antifreeze!
  13. Consider buying a Berkey Water Filtration system that sits on your counter.  Found on Amazon or their dedicated Berkey site.  Not cheap but great peace of mind.

and remember…..

Dump the black water tank first….then the grey water!

Put at least 4-6  or so gallons of water (depends on size of your tank or how long you will be not camping)  back into your toilet and add your black tank digester.  We prefer Happy Camper or Unique brands.

You do not need to use RV toilet paper….any Septic Safe labeled T-paper is fine as long as you use sufficient water each time you flush.  What I tell my grandsons is if you do #2…then hold the pedal down for as long as it takes you to slowly count to at least 6.

*I recall reading numerous reviews about a campground in south western Arizona that had multiple complaints and even was shut down by their local health department due to fouled fresh water being run through pipes to their campsites. It pays to read campground reviews before you park! (NOTE: we always have at least 4-6 filled milk jugs of our own home water with us on any given trip. If anything, we use them to “flush” when boondocking or using our toilet at a rest area.

Here’s to happy and SAFE camping!

From Kevin & Luisa Sherman

Avion ’73 Rear Tire Carrier & Tire Cover

Recently there has been several newer Avion owners seeking info on the rear tire carrier and their original hard plastic covers.

Did you know this was an OPTIONAL item back in the day when Avion’s were being ordered or purchased? Yup….a SPARE TIRE CARRIER for the rear bumper would set you back another whopping $33 for tire holder and $16 for the spare tire!!! This explains why you will see some Avion’s of this or earlier vintage with nothing on their rear bumper. I am not quite sure where or if the owners carried a spare, lets hope they did somewhere! Perhaps strapped down on the top of the 1973 Mercury Station Wagon roof rack!! [ my dad had one of these!!]

001

Check out these 1977 AVION Trailer OPTIONS and Standard Equipment lists!

2017-08-03 12.19.13

2017-08-03 12.19.22

(yeah…what happened to THOSE prices right!??) Above is an awesome list of options from a 1977 sales sheet we found at the archive library at the RV Hall of Fame Museum in Elkhart, Indiana in 2017!

Lucky for us our 1973 Avion (that we purchased from the 4th owner who resided in VT about 2 hours from us) had the original tire carrier welded onto the rear round bumper. We would never travel anywhere without a spare tire. But we are constantly amazed at how many RV owners of all brands and styles do! Seriously?? To us having a spare tire is safety and responsibility 101.

Here is a photo of the rear of our Avion in as purchased condition in fall 2016.

2017-06-08 20.46.11

Shortly thereafter, we purchased this great vinyl spare tire cover which I really love. This enabled us to take off the original hard plastic spare tire cover (another optional purchase when originally ordered) in prep for its refurb.

Note- if you are looking for reproductions to replace worn out Travelcade stickers like the one centered above our running lights, please visit our blog post all about Avion Medallions and Emblems. I have links to all about this sticker and where to purchase reproduction replacements!

2017-07-23 17.07.52

Here is the link to that vinyl tire cover. It has held up very well in 3 years. The elastic stays supple and strong, the vinyl has not faded and it comes in a variety of sizes.

https://www.amazon.com/gp/product/B001DL8PBG/ref=ppx_yo_dt_b_asin_title_o02_s00?ie=UTF8&psc=1

These hard plastic covers were originally sold with a nice locking bolt feature (see picture below), but most of those locks are long gone now. Occasionally we will see one still existing on an Avion. Below is one that we came uponm for sale in Milford, Michigan when attending the 100th Centennial of the TCT (Tin Can Tourist) club rally. The owner of this ’74 Avion had her out on the end of a driveway for sale, BTW it was sold within 1 week of the rally! Some one got a good deal at $4500!

(below is NOT our Avion. Photo is a Avion for sale on side of road in MI in May 2019)

20190514_155503

Once our hard plastic cover was removed, we knew it was going to need suring up of the center mounting hole.

2017-05-13 09.48.48

There is a considerable amount of stress over 45 years that is put on that bolt and the center circular opening had stress cracks and its thickness of hard plastic worn thinner from rubbing and wear.

We took the cover to a local auto body repair shop, Dave Ure’s in Queensbury. We were pleased with the results but it came at a higher cost than anticipated, $434.00 when all was said and done. ouch!

They did do a great job of applying some additional reinforcement material on the back interior of the tire cover around the center hole while also applying a beautiful hard auto finish paint coating and sealant of the outside of the tire cover. We had selected the color to compliment our interior color scheme and add some pop to our rear end! The finish and coating applied resulted in a very durable, hard finish that no doubt will last a very long time.

For the lettering, we wanted something that would add some “bling” and even more pop to our “rear end” of the RV. We also wanted to some double duty marketing opportunity to promote ourselves and this blog. So we laid out a rendering of the lettering we wanted and took it to Mac The Knife who we had refurb our rock guard and had done an awesome job (better and cheaper than Dave Ure’s shop) Mac followed our instructions to a tee. Mac The Knife is an auto detailer on Quaker Road in Queensbury only about a mile from our house. We are very happy with the results.

Total cost of the lettering by Mac the Knife was: $200.

So while we have a considerable investment (nearly $700) in our original cover, she is beautiful and will surely last us a lifetime of enjoyment! yes, its secured in place!


Below are some photos of our rear tire carrier hardware.

This is the optional feature that sold for the $33 in 1973 when our first owner (we are owner #5) purchased our 1973, 28 foot LaGrande.

We have yet to do a repaint on this. It honestly does not show since the cover is on, but at some point we will repaint it completely. The photos may help those of you who are chosing to have one fabricated. To the best of our knowledge there is no one who currently has these for sale in stock, so you would need to be lucky enough to find one from a parts salvager. NOTE, we believe that the 1980 models and newer of Avions had a very different configuration and system for spare tire storage.

It should be noted that this carrier is really hefty and well made. It is securely welded to the round bumper. We have since installed a clamped on (with long bolts) hitch receiver so that we can mount a bike carrier or a storage shelf on the back of our bumper when needed.

One of our plans include attaching vintage metal coolers (aluminum skinned, bought on Ebay, $25-45) to the rear bumper to serve as extra storage area for sewer hose, and spare electrical cords. They can also double as ice chests for beverages once set up at camp. They even have bottle openers built into their side handles! The original hollow bumpers are too small of a diameter to handle modern sewer hoses and couplers. We DO however keep a spare 30 amp RV power cord in stuffed in there and snake it out when needed…which has happened that we need an extension to our regular built in cord. For example, at Sampson State Park in the Finger Lakes of NY.

2017-09-05 08.12.00

Safe and Happy travels to you! If you have enjoyed this post, or found it helpful please follow our blog by activating the box at top right of this page!

Let us know if you have enjoyed this information. Also let us know if there are topics that you wish we would cover and have not yet! We are always interested in what YOU are interested in when it comes to Avion life and passion!

Thank you!

Kevin & Luisa Sherman

K-L and Avion-bitmoji-withCopyright2bHr

Avion LaGrande-Exterior Storage Compartment Weatherproofing

May 21-22, 2017:  We have had perhaps one of THE wettest Spring in memory here in the Southern Adirondacks of NYS this year.  With the tons of rain has come the realization that our curbside, exterior storage compartment (which also is a direct access to MY underbed storage area too) has leaks around the compartment door.

Fletch had done a very good job of resealing the outside flanges with Parbond, but the critical issue now was obviously the alignment and need for new gasket that worked properly.

2017-04-21 15.21.38

It seems that at some point, a former owner of the trailer replaced the foam gasket that was supposed to provide a good seal against wind and weather—however either due to time (it had gotten hard) or perhaps not being the correct gasket from the start, this black gasket weatherproofing has failed.

What has resulted is that the door of the compartment does not recess and lay flush or slightly inside the exterior skin of the trailer sidewall. So, when it rains, the rain literally runs down the side of the trailer and right into the gap and into the compartment. Not good!!

Kevin took off the door completely.  Removed and cleaned up the aluminum track area where door seats into body of trailer.  He also found a weatherstrip gasket in a light grey which worked perfectly.  It is far softer and wider and allowed for readjustment of the door so that now it sits correctly and flush to the body of the trailer.  Wholla…no more leaks….but we continue to get rain, rain, rain!  

Finished project.  Works great!

Great job Kevin!!