Category Archives: Rockstar Mud Flap System

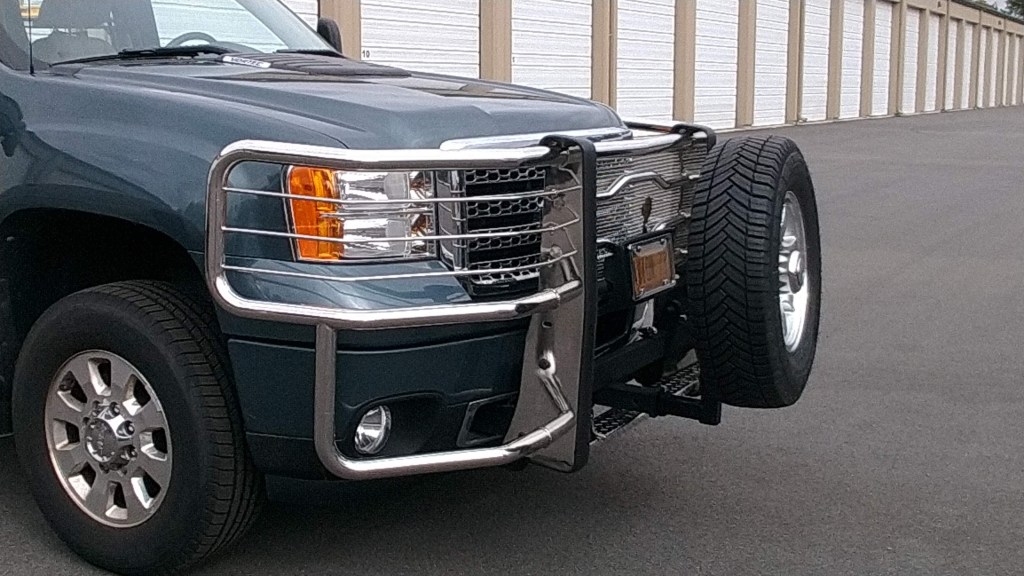
Trick’in our Truck – for Safety, Comfort & Towing our Avion Travel Trailer

Lets face it, you can have a great route planned, your RV all geared up, food stocked, LP topped off,  campground reservations made BUT

BUT!!!! if your ride is uncomfortable, unsafe or not helping you with towing along the way—the TRIP CAN BE UNCOMFORTABLE, UNSAFE AND COULD END IN DISASTER for you, your truck and your beloved RV!

We purchased our 2011 GMC 2500 HD Denali Crew Cap truck in 2018.  It had just under 28K miles and in super condition.   It is a 4×4, 6 Liter gas engine with a 6-speed transmission and a 4.10 rear axle.   Here is a promo video of it when it was being sold by the dealership we bought it from.  It was a search on CARFAX that finally landed us our “Merlin”– so nicknamed because it was magical how our “must have list” of truck features was finally found….albeit in New Jersey!  So after calling them and putting down a small refundable “on hold” deposit with a CC, we made an overnight trip to NJ from our home in upstate NY traveling 5.5 hours to arrive as soon as the dealership had opened that morning.

OVERVIEW OF UPGRADES & SYSTEMS WE HAVE IMPLEMENTED SINCE PURCHASE:(Below this list we go into each upgrade in more detail with photos, etc.)

  1. Installed Sumo Springs Front & Rear Bump Stops,  Bilstien Shocks and SuperSprings Low Leveling Metal Springs on the rear to assist with suspension and overall handling.
  2. Installed ROCKSTAR Rear Mud Flap System to prevent rock chipping of trailer
  3. Installed DECKED Storage System in Truck Bed to increase storage capacity
  4. Installed Front Grill Guard to prevent excessive damage to grill and engine in case of accident or wildlife damage (affectionately called our “Moose Guard”- we live in the Adirondacks!)
  5. Installed Class 2 Hitch Receiver to hold spare tire or front storage flat rack on the front
  6. Installed WEATHERTECH Interior Mats to maintain carpet
  7. Installed Window Film in Cap to provide privacy and security of stored items or if using for overnight sleeping
  8. Purchased and use the TST brand, 507 model TPMS (Tire Pressure Monitoring System)
  9. Purchased and use the GARMIN RV specific GPS system
  10. Removed our back seat, covered back panel still utilizing the seat hooks and use bungy straps to secure items we use at every camp set up (other than boondock 1 nighters at Walmart, etc.)

Still to be done before we go full time in Spring/Summer 2023:  Installing a Meckman 400 AMP Alternator (to recharge our Lithium Ion Battleborn Battery system as we are driving)

_______________________________________________________________________________

LET’S GET INTO THE “WEEDS” OF THE DETAILS!  we have included “where to buy” links where possible.  Feel free to reach out to us with any questions you have on any of the information we have in this post!

  1.  SUMO SPRINGS, BILSTIEN SHOCKS & SUPERSPRINGS INSTALL TO SUSPENSION:

Why?  We improved the ride and alleviated any “squatting” of our truck by adding additional suspension aids.

What? The old/original bump stops were old and very rough.  Sumu springs have a dampening cushioning effect which takes the rough ride out of the vehicle because they are open foam and they engage softly and become firmer with weight- hence a better ride when your truck is heavy and towing a heavy trailer.  We installed them front and rear.  We then added the SuperSprings to the rear.  They mount to the leaf springs on the back of the truck. These add support and weight carrying capacity to the leaf springs.  This helps alleviate the “squat” to the truck when hooking up our Avion travel trailer.  Use the link above to view the product and see a company video about these Supersprings and their application and purpose.

2.  ROCKSTAR MUD FLAP INSTALLATION:

Why?  After taking a long trip from our home in eastern upstate NY to MI we found a plethora of super small rock chips in the front of the 73 Avion we owned then.  They happened literally the last 15 minutes of the trip.  We had to go through a road construction zone where the crew was milling up the road- we were going less than 15 mph when it happened!  Now with these mud flaps we get far less mud, grime, and rock chips on our precious Avion (we now own an ’87 and use a Hensley hitch which is different than the GenY hitch in photos shown)

What? We got lucky that our local auto detailer (who had rehabbed our Avion rock guard and spare tire cover) had this ROCKSTAR mud flap system for sale in his shop- so no shipping fees!  He was ready to retire it from the showroom since it was a few years old.  We got it for less than half the going price for the same guard system.  This is the full bumper type that is installed, not just flaps screwed on.  The system CAN be completely slid off and removed if desired but it is very heavy and awkward for one person to do.  We have it installed by sliding  it over our 2.5″ hitch receiver which a 2″ hitch insert in it-the guard is fastened to that insert and locks in place.   Besides…we think it looks pretty jazzy!

Considering installing mud flaps?  Please read our more in depth article that covers installation tips, etc. Read more….

Link to Amazon listing– very similar to ours

3. DECKED TRUCK BED STORAGE SYSTEM WITH DRAWERS:

We cannot say enough about this system.  Yes, it is pricey, and we also paid to have it installed professionally by our local auto detailer.  But we have found over and over again it is a lifesaver.  It has actually increased our bed storage capacity since it covers over the wheel wells making a flat surface area to allow for more large storage totes.  It’s flat surface can now even fit a double sized air mattress easily to do overnight sleeping in the truck bed very easily and comfortably- + added bonus, you are not laying on metal truck bed.  The 2 full slide out drawers serve as awesome, double LARGE tool boxes-easy to pull out and access everything easily and within sight.  Kevin recently purchased some of the DECKED tool boxes that are made to fit inside, this is an option but not necessary.  Previously, he used other canvas tool bags, tool cases, etc. before this just fine. These drawers negates the need to have multiple tool kits packed in the truck cab or loosely flying around the storage with other RV gear. Your tools are all in one place and always quickly available-which for us is key!

Another plus of this system for security purposes, is that anyone looking into your truck bed through the windows will only see a floor.  They will not see any tools (which tend to be eye candy for many).  You really cannot tell that there is a DECKED system installed since the tailgate covers the drawers completely.  There are also two small, easy access storage compartments on either side end of the floor top.  We keep bungies, flares and other safety equipment in them for easy access.

Hey…it even has a built in bottle cap opener in the center!

Here is a Link to their site

4. & 5. INSTALLED FRONT GRILL “MOOSE” GUARD & HITCH RECEIVER FOR OUR SPARE TIRE:

Why? We have seen way too many front grills demolished by deer & moose hits and vehicle accidents.  We live in the NY Adirondacks afterall!  We also know that our full time RV life will include many areas where there are very large moose, caribou, deer, bison, etc. as well as crazy drivers. 

What? In order to better protect our truck’s major asset—its engine and grill–we installed this beefy grill guard 3 years ago. We did have to remove the factory tow hooks off the front to do the install, but the grill guard has built in hooks on its beefy frame.  Because the guard was heavy enough steel, we had a local welder install a hitch receiver on the front so we can now put our spare tire mount on the front.  We will carry our bikes on back of the Avion.  We actually have found the weight added by the grill guard and the spare tire has helped to equalize our our truck’s weight distribution especially when hooked up to the Avion and its tongue weight. 

Bonus!  This front grill guard also makes a dandy beach towel drying rack!

Here is a link to one we found that is very similar to ours on Amazon

6.  Installed WEATHERTECH interior mats 

Why? Let’s face it, as RVers we spend a lot of time in our vehicles in all sorts of weather, juggling all sorts of drinks, snacks and foodstuffs while plying the highways and byways of our country.

What? Our local auto detailer loves us!  We purchased these from them as well after carefully reviewing a whole lot of online sources and reviews.   These mats are molded and custom fitted to this model year-they fit perfect, do not slide around and are so easy to remove to hose off.  They protect our carpet from dirt, grime, stains, mud, snow, ice, etc.  Once we go full time in Spring 2023 this truck will be our home, this will be our everyday, only vehicle.  We want to do the best we can to maintain its condition and cleanliness.

Here is link to WeatherTech

7.  INSTALLED WINDOW FILM ON SOME BED CAP WINDOWS:

We installed this film early on after purchasing our truck.  We used household window privacy film purchased at Lowes.  It was very easy to use and install.  We have found that since the side slide windows have built in screens- we have not been able to install it there as the screening is unable to be removed easily.  We thought this was going to be an issue  however, now that we have put in our big black totes (with yellow tops from Lowes/Home Depot) they essentially block any views in from these side windows.   What you see is black tote side- so hence not really an issue anymore.  To date we have only covered the two odd sized large side windows in film for privacy when/if we sleep in the bed overnight or to provide some security of goods we have in the back.  We have NOT covered the back window yet because we still keep some totes out of the bed and can use the rear view mirror in cab to view rear when not hitched up.  Once we go full time and the back truck bed is fully loaded we may also install a limo film over all the windows. 

Link to Lowes- the actual film we used.  There are many other great design options available. Just be aware some are more transparent than others which may not give you the privacy you may want. 

Note- even though this is sold as household window film we have had excellent results using it in our truck bed cap.  It has held up well, no fading, peeling or failure due to swings in weather temperatures, etc.

8. TST Brand, Model 507- TIRE PRESSURE MONITORING SYSTEM

Another key safety factor (has saved our butts twice in just the last 2 yrs) is getting a Tire Pressure Monitoring System.  We have installed the monitors on BOTH our Truck AND our Avion Travel Trailer.  Some only install on their trailer.  In our opinion that is insufficient, as evidence by,  on a trip out to Indiana from upstate NY we got a signal our rear passenger side truck tire was losing air.  As it turns out, the valve stem had gone bad.  It was 9 PM at night and luckily we were on an interstate highway that had a large truck stop and the shop is open essentially 24/7 to assist truckers.  We limped in before our tire became too flat to travel-thanks to the TPMS warning!  It was fixed in less than 15 minutes and we were on our way.

Here is a great vendor (TechnoRV)  that we have purchased other equipment from. The link below is a current model, similar to what we have but with some improved features:

LINK to TST Tire Pressure Monitoring System 

Note- When we purchase new tires (we do at least every 5 yrs regardless of miles or condition) we will then order a new, current model TPMS system and we will be purchasing the type of sensors that are “internal sensors” that are mounted inside the rims, then the new tires are mounted and balanced-making the sensors less susceptible to weather conditions, with more longevity and less maintenance.

VERY IMPORTANT NOTE: If you purchase the type of sensors that mount on the tire valve stems–Due to the extra weight that the actual screw on monitors make onto valve stems it is HIGHLY RECOMMENDED that you switch out stock valve stems(rubber/plastic which even over time crack and degrade due to weather, sun, salt, etc.) with metal valve stems.  It is not a big deal but will greatly enhance the longevity of the system all around.

Presently, we remove our sensors after every camping season and store in our house since we store our trailer over the winter months.  We replace with new batteries in each sensor at least every other year to ensure they are fresh and sufficiently charged.  The monitor sensors come with a little locking clip that is used when they are put on and removed- this prevents theft for the most part.  Our system is about 4 years old now and we may replace with a newer bluetooth wireless type before going full time- but ours is working fine.  We have run the wire cable in the cab of our truck and Kevin prefers to keep it on his side of the dash when driving- I am responsible for the GPS and monitoring road grades, etc.  on my side of the dash. 

*You can also opt to have the sensors actually installed inside your tires if preferred.  Currently, we like having the option to take them off in winter months when trailer is not in use for right now but may do the internal application once we go full time.  Afterall, you should be replacing your tires every 5 years anyway.

9.  GARMIN GPS SYSTEM ( OR OTHER GPS SYSTEMS)

20210611_13242320210613_171436

We happen to have a Garmin GPS RV System- there are multiple screen sizes available now . It is about 4 years old and hopefully newer models have better voice command and display features.  For our needs it works for now.  We will tell you we do not always rely solely on this system and Luise will often be running her Google Map directions on her cell phone simultaneously especially when in more urban areas where it is easier to use the search feature quickly.  Please do NOT rely solely on Google Maps when towing your RV!  An RV GPS is programable to your trailer’s height, length, weight and width and the routing will steer you onto roads  you can do.  We live in the northeast where there are lots of old bridges and tunnels with weight limits and low heights from RR overpasses, etc.  Google will send you down a virtual rabbit hole!

We have found our model of Garmin is very POOR in the audio command module.  “She” rarely understands our most basic commands by voice and it is extremely frustrating (hence using Google on cell phone instead to ask quick search functions).  This model Garmin also really in our opinion requires a passenger to use while on a trip.  There are many times where Luise will need to scroll through settings to find things we are looking for and also to toggle between showing map and the split screen of Map/Road Grade features if we are on exceptionally hilly/mountainous terrain.   Our model is one that handles truck/RV settings.  This is very important!  You must preset the parameters for your trailers height, weight, width, and length in order to have the system run best and safely for your towing needs.

*The grade feature really came in handy on our trip on the Skyline Drive and Blue Ridge Parkways through the Shenandoah Mountains in 2021.  Using the grade setting showing gives you some very good advance notice of when there will be significant climbing or downward grades allowing some preparation.  Plus its really fun to see just how high in elevation you are at any given point on your trip!

On the second photo above you will see where we are using the setting that shows a photo image of an exit ramp driving view which we really like especially when coming up on multiple lane intersections or ramps.  It gives the driver a clear vision of which lane you should plan to be in.  It is nice when this works, but not all exits have been photographed to show this feature in our experience.  When a photo is not available, a closeup of the exit ramp or intersection in graphic form will show up on that right side of screen.

Below is a good photo showing the road grade  & elevation visual on the right side of the screen.  You have the ability to spread out this graph based on how far in advance you want to see it by miles.  We have it condensed so what you are seeing is probably the next 10-15 miles (yes, we went from over 5K elevation with a peak grade of 21% grade to a low of 1700′ elevation of 3% grade with a few mountain peaks in between on the Blue Ridge Parkway!)

KIMG1954

10.  RECAPTURING SOME STORAGE IN TRUCK CAB- REMOVING REAR SEATS

Removing our back crew cab split bench seats are a bit of a consternation for us.  On one hand we would like them to transport grandkids when/if they camp with us or taking guests with us into town, etc. on a day trip. In truth, those occasions are very rare and we suspect that once we go full time, it may only happen a couple times a year. In reality, gaining some amazing storage back there that is super easily accessible on a daily basis has won out- at least for now.  We removed the split seats (may put one back in since we typically will only have one grandchild at a time camping with us).  Along the back wall of the truck cab, Kevin installed a 1/4″ sheet of luan type board sheet to encase the back but allowed the U shaped bench seat hooks (that hold the seats in place) and these are what we use to hook bungy cords to.  Stored in this space we can put items that we use a nearly every 2+ night camp.  This includes; our 2 folding recliners, 2 everyday chairs, a folding table, our large cooler and a small cooler for drinks,  a first aid and emergency roadside kit and bag of snacks for the roadtrip.  We have found it very handy to have this space available- especially if we have set up camp and/or plan to be away from camp for the day, or it starts to pour rain and we want to get our chairs and small Weber gas grill inside and under cover quickly! (Has happened many times!)  Once camp is set up and this above equipment is set outside, this space in the truck also provides a great place for us to store our Ebikes folded up safe and sound.

Mud Flap Install- Protecting the Beauty!

We spent the following week preparing for our big trip out to Elkhart, Indiana to enjoy the Silver Avion Fellowship Rally with 41, count ’em…41 other Avions! While at it…we installed a mud flap system to protect our silver beauty!! 

Back story.……When we returned from our longest road trip to date (16 days) to Dearborn, Michigan this past May/June for the TCT (Tin Can Tourist) Centennial Rally we noticed that at some point, we must have driven over some loose gravel, rock chips in a construction zone because on the curbside of our Avion front area (yes, the area where Airstreams have those protective “wings”) we had a whole lot of small, tiny dings into our aluminum skin.  We  know these were not there prior to our trip.  It is worthwhile to note that with our multiple excursions now through Pennsylvania, Ohio, Michigan, and Indiana…that the roads in those states are not nearly as good, or well maintained as ours are in NYS.  So ok, higher gas taxes, and over all taxes may have some redeeming quality…but we still live in one of THE most expensive states in the union–so not much solace there.

So we have decided to purchase a mud flag bumper guard set up for our tow vehicle which is a 2011 GMC 2500 Denali HD, 6L gas, 4 WD, Crew Cab with Leer extended bed cap (which we LOVE!!).

20180630_151125833740899135420454.jpg

A mudflap system would have most likely 99% prevented these chips from happening.  Only sorry we did not do sooner, 46 years on the road and our baby got dinged!  Not only does a mudflap protect from errant rocks coming up and hitting your rig, or worse yet, your rockguard or windows…BUT it also handles…well….MUD (snow, slush, dead animal debris, floating garbage or UFO’s on the highway!-yes it happens!)  Kevin works for NYS DOT and can tell you amazing stories of what his crew finds on the highways.  Mud was the other thing that washed up onto our Avion body front during this most recent trip.

Kevin got lucky when he inquired about pricing for a Rockstar Mud Flap bumper system at our favorite local after-market auto parts detailer and installer- Mac The Knife (Mac also is the one who redid our rock guard and spare tire cover- he does great work!)  Mac happened to have a left over demo model of a Rockstar brand system that he had had on display in his shop a few years back.  Yeah, it was dusty but Kevin got it for less than 1/2 price off current retail …and it is the same system being sold today for over $479 list.  Here is link to similar set up that we have which is currently available through ETrailer.com.  FYI-We have purchased several things from ETrailer.com and are very impressed with the ease of ordering online, their quick shipping and quality products.  They have a huge inventory of tons of stuff and their customer service reps are very good.

Bear in mind, these things are heavy.  We realized that since this will be a one time purchase for us…and when we are in our 70’s and 80’s and still on the road (don’t laugh…we will be good LORD willin’ and the creek don’t rise!) we needed the easiest way possible to lift this baby off the back hitch to store it away if we did not want to cruise around with it on the truck (it does add weight= lesser gas efficiency when not towing)

Here is a good video to show how you hook on the system to your rear bumper.

So Kevin had the idea to create a semi-permanent fix which was to affix the flap system to the receiver piece insert which then can be pulled out with the mud flap bumper system.  Otherwise, we would also have to be pulling off the entire (and super heavy) GenY Torsion Hitch with the whole mudflap bumper system attached as one unit.  That GenY Torsion Hitch is also a great piece of equipment and we will do a separate post just on that and cross link it here at some point.

AccessRockstarMudflapsBumperFlange_2
view of bumper step, where guard sits atop for custom look

Steps we did:

  1. Retro fit a longer 12″ insert reducer from 2.5″ to 2″ so that we could bolt the mud flap guard system right to that. Here is the link to the additional hardware bracket needed as well.   Link to hardware sold at ETrailer.com
  2. Kevin used a DeWalt Saws-All with brand new blades to cut off the excess length off the reducer.  Be sure to clamp down the reducer so you get as straight a cut as possible.  The reducer was too long and butted right  up to our spare tire, so that needed to be trimmed back by several inches.  Doing this however, then threw off the alignment of the pre-drilled side holes in the reducer, making use of a hitch pin lock impossible.
  3. He then used several different drill bits to cut new holes in the correct positions needed to now be able to throw the hitch lock 5/8 ” pin through. It has a key lock and we have had it rekeyed to match the truck ignition so you always have it handy!
  4. We followed some video’s found on YouTube for the Rockstar brand installation because as we mentioned, this was a store demo unit and therefore we had no instructions or paperwork with it.
  5. Once installed where we knew it was properly in place, we also had to install a Heat Shield (bought on Amazon, see our link/resource page) to prevent the heat from our large exhaust pipe from damaging (a.k.a melting!) our heavy rubber mud flaps.

heat shield

It is very important to have this heat shield if your exhaust goes out back before using the mudflap unit. If your pipe exhausts to the side you will not need the heat shield.

IF you are purchasing a brand new kit, you may have to put your unit together yourself.  See Video    As a demo model…Kevin did not have to do these steps!  Ours was ready for install!


2019-07-04-16.42.52.jpg
This is showing the install WITH the GenY Torsion hitch in place.  The GenY now can be removed by itself and the mudflap guard system stays on the vehicle unless we decide we want to take it off for non-towing times, or touring. Still to do was install the heat shield, and apply some bumper pads on truck bumper to protect from rubbing of mud flap bumper tabs.

If you have any questions about this install, or why we chose our hitch or this mudflap system, feel free to email us directly at 1973Avion@gmail.com!  We would love to hear from you!

Safe journeys!  Share photos of your mud flap project with us on our facebook page!

Kevin & Luisa Sherman

K-L and Avion-bitmoji-withCopyright2bHr