Are you bothered by the beam of light that comes through your roof vent in the morning—saying “wake up its 6 AM??”

Even though we have MaxAir Vent covers in the smoke plexiglass color we still find that the morning light coming in really robs us of some extra ZZZZ’s! So I looked for an inexpensive way to fix this issue. We do have modern Fan-tastic in our Avion, but this fix could be used with other types of roof fan vents too! A quick look on Amazon and even just Google shows there are all sorts of sizes available out there.
Then again, you could wear a sleep mask but we find them a little uncomfortable and can be hot.

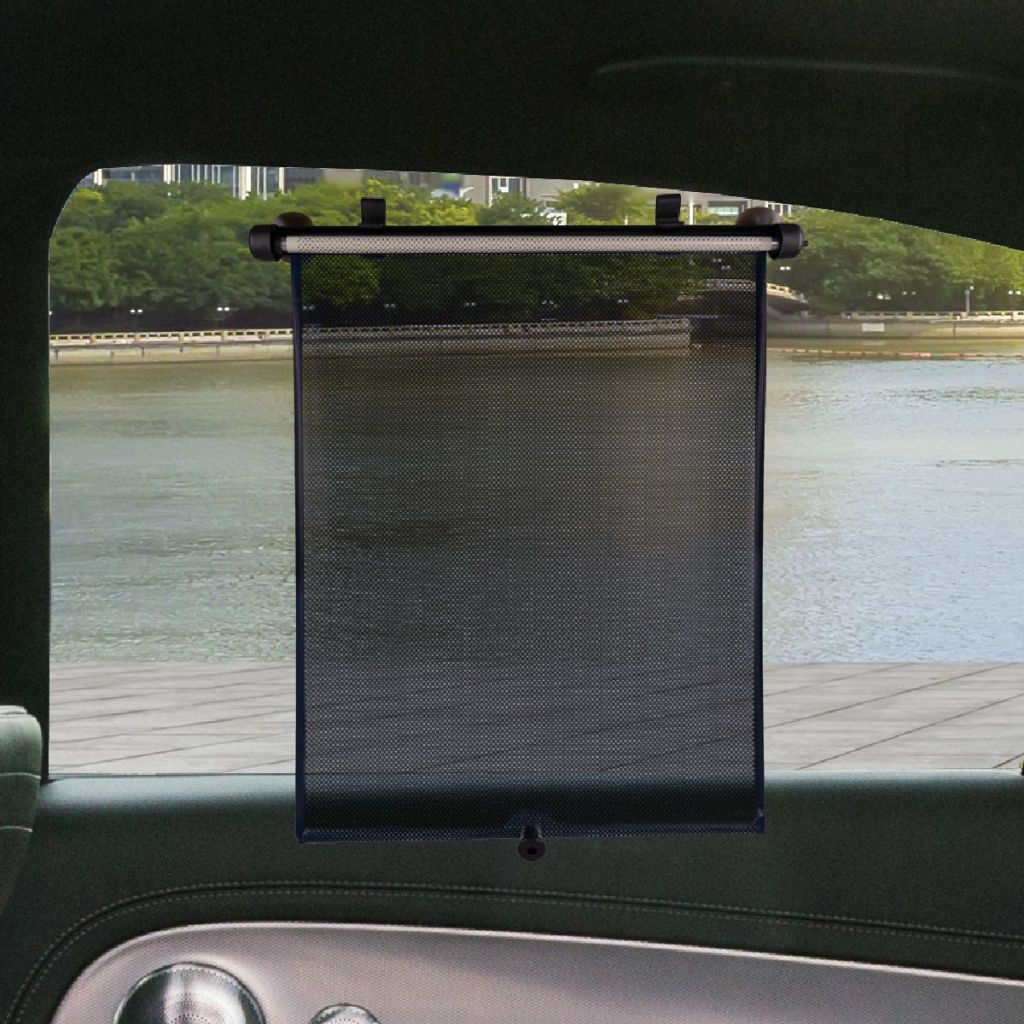
Key to choosing a window shade is that it should have perforations so that you can still use the fan feature when your “shade is drawn closed”. Here is an image similar to what we purchased, on clearance at Camping World for $6.
First thing I did was cut off the actual retraction roller bar part. I did not want to have to screw that into our ceiling and felt that I would not be able to get a strong enough bond to take the pressure that was needed to “pull” the shade across our vent screen area. I left the other end intact which had a stiff rod through it and a small fastening area (on left end below). I felt this would add some stability as this would be the end that will be unrolled/rolled up to stow the mesh.
I used the Scotch brand traditional velcro squares below. I did NOT use the heavy duty click together type which the velcro adheres far more permanently to your surface and these are usually what I use for far heavier items.

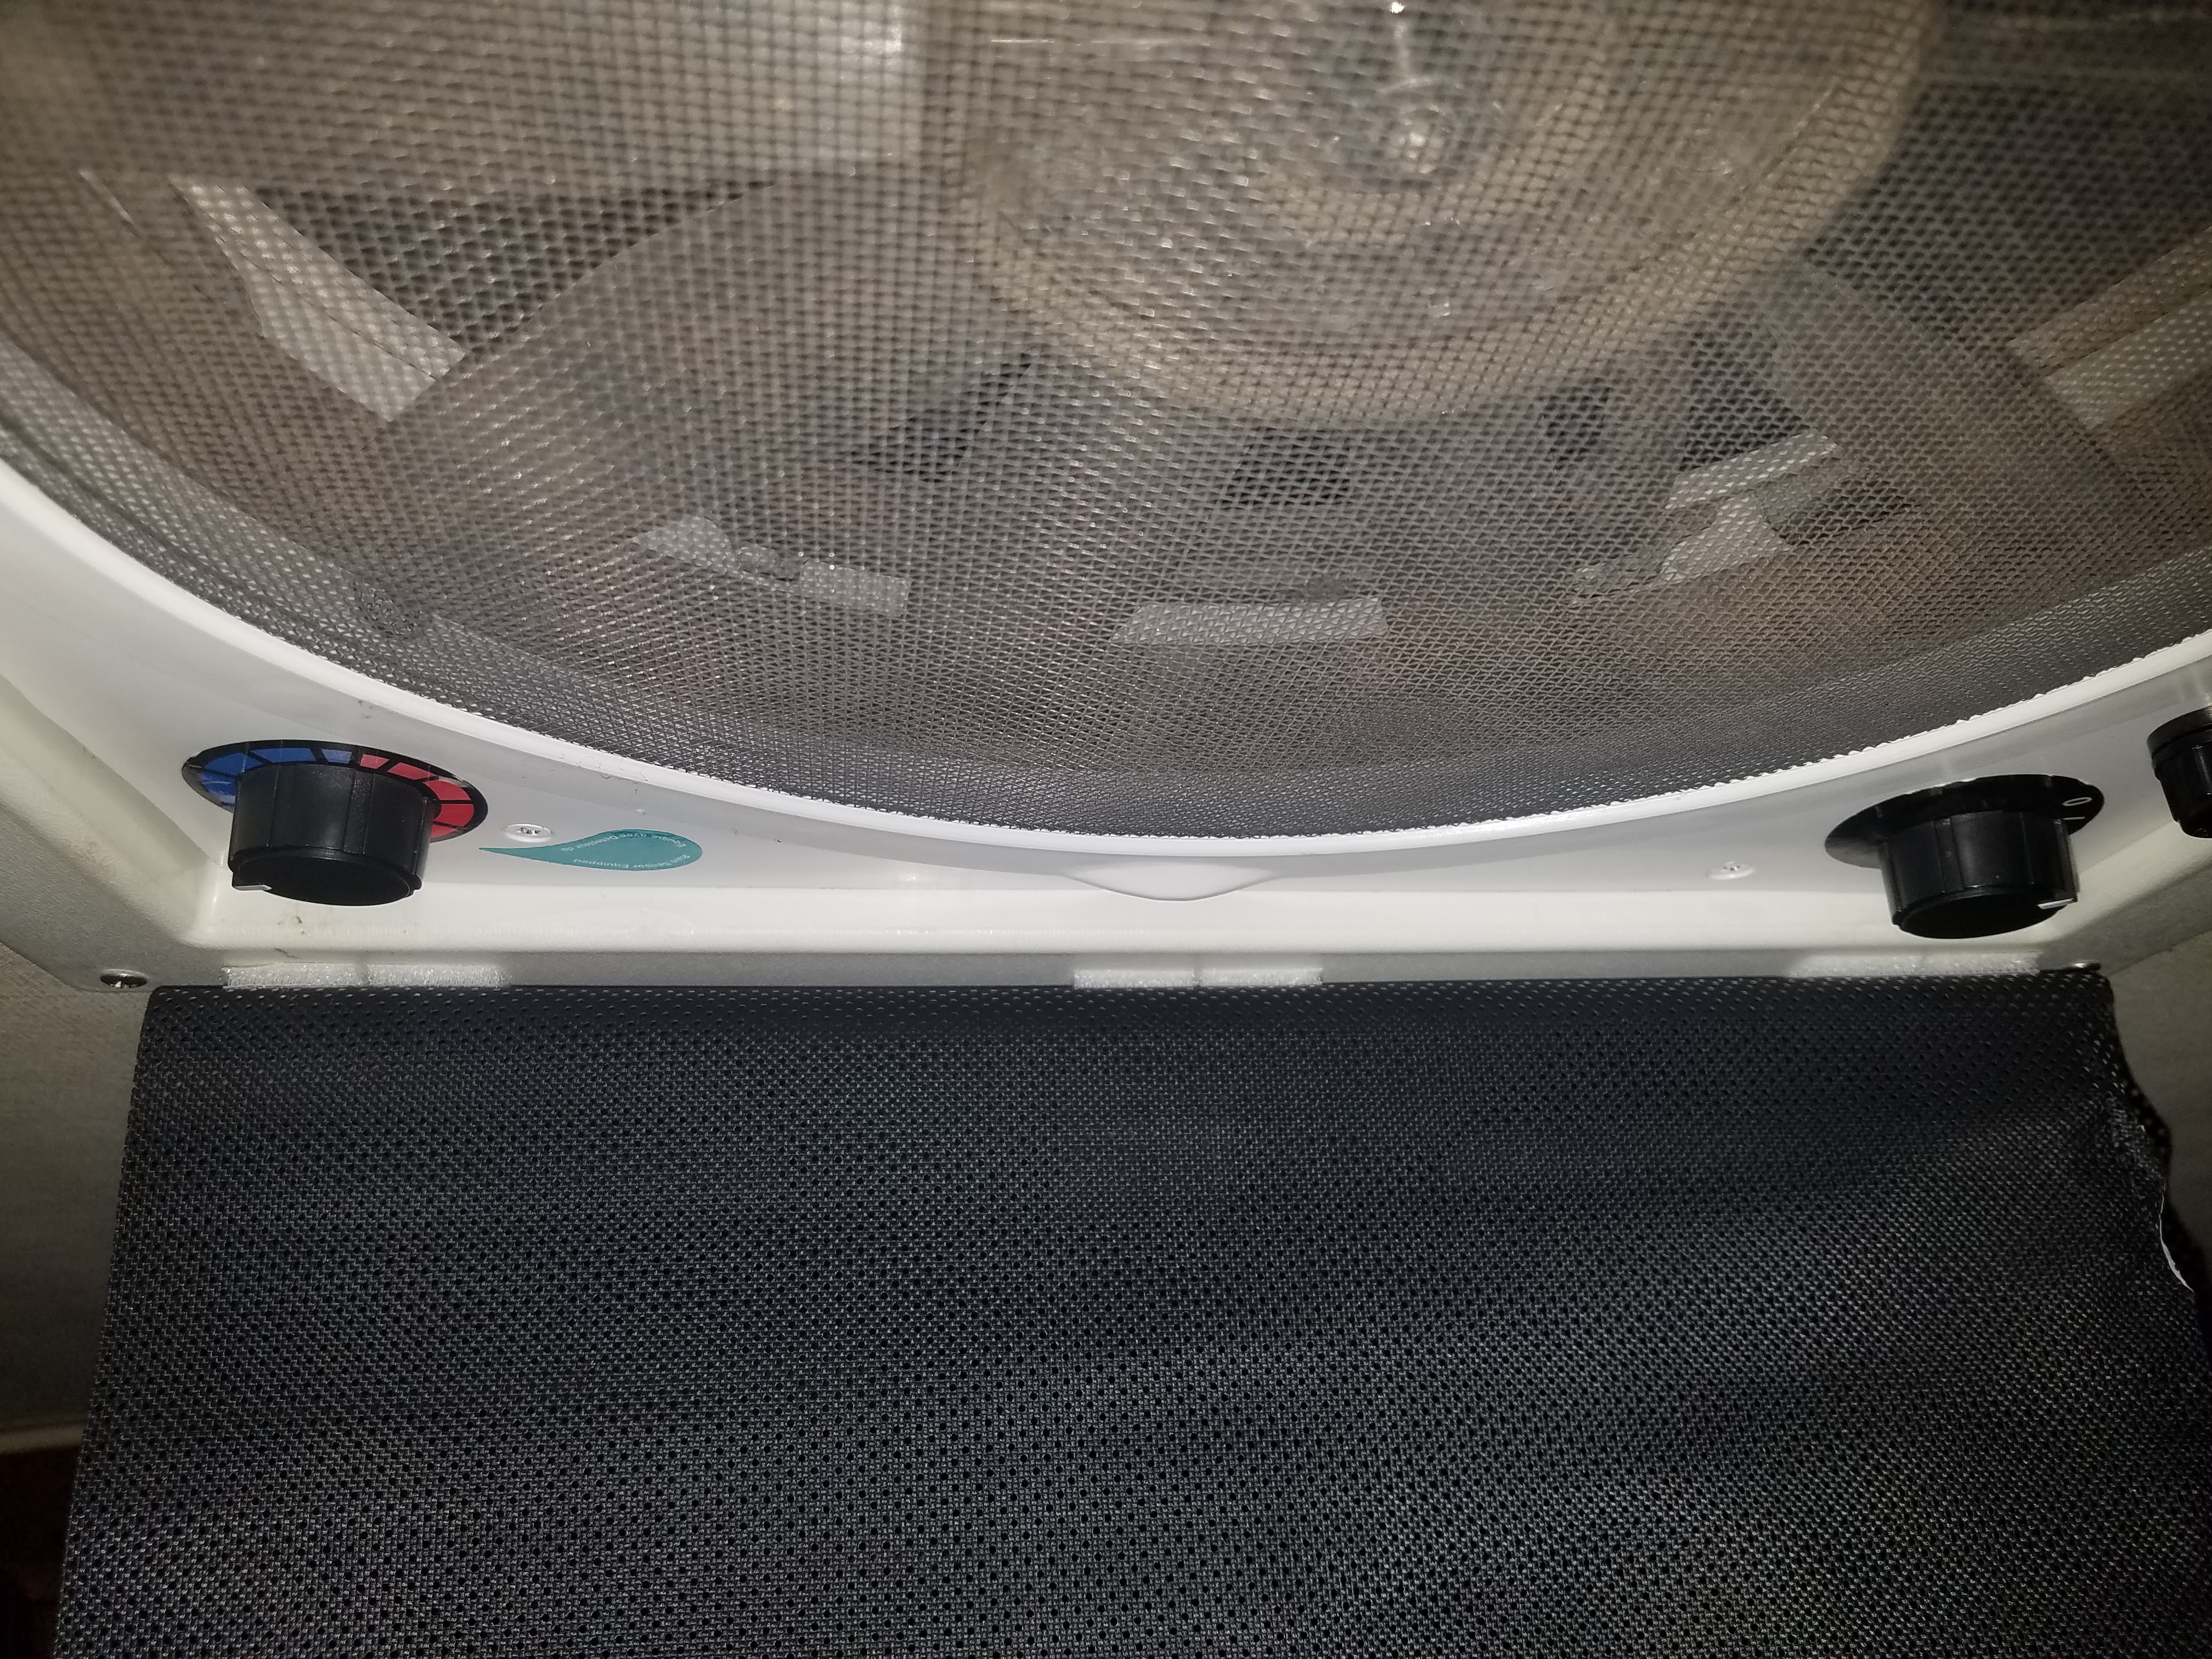
I then applied 3 pairs of 1″ white velcro squares on the cut end of the mesh.
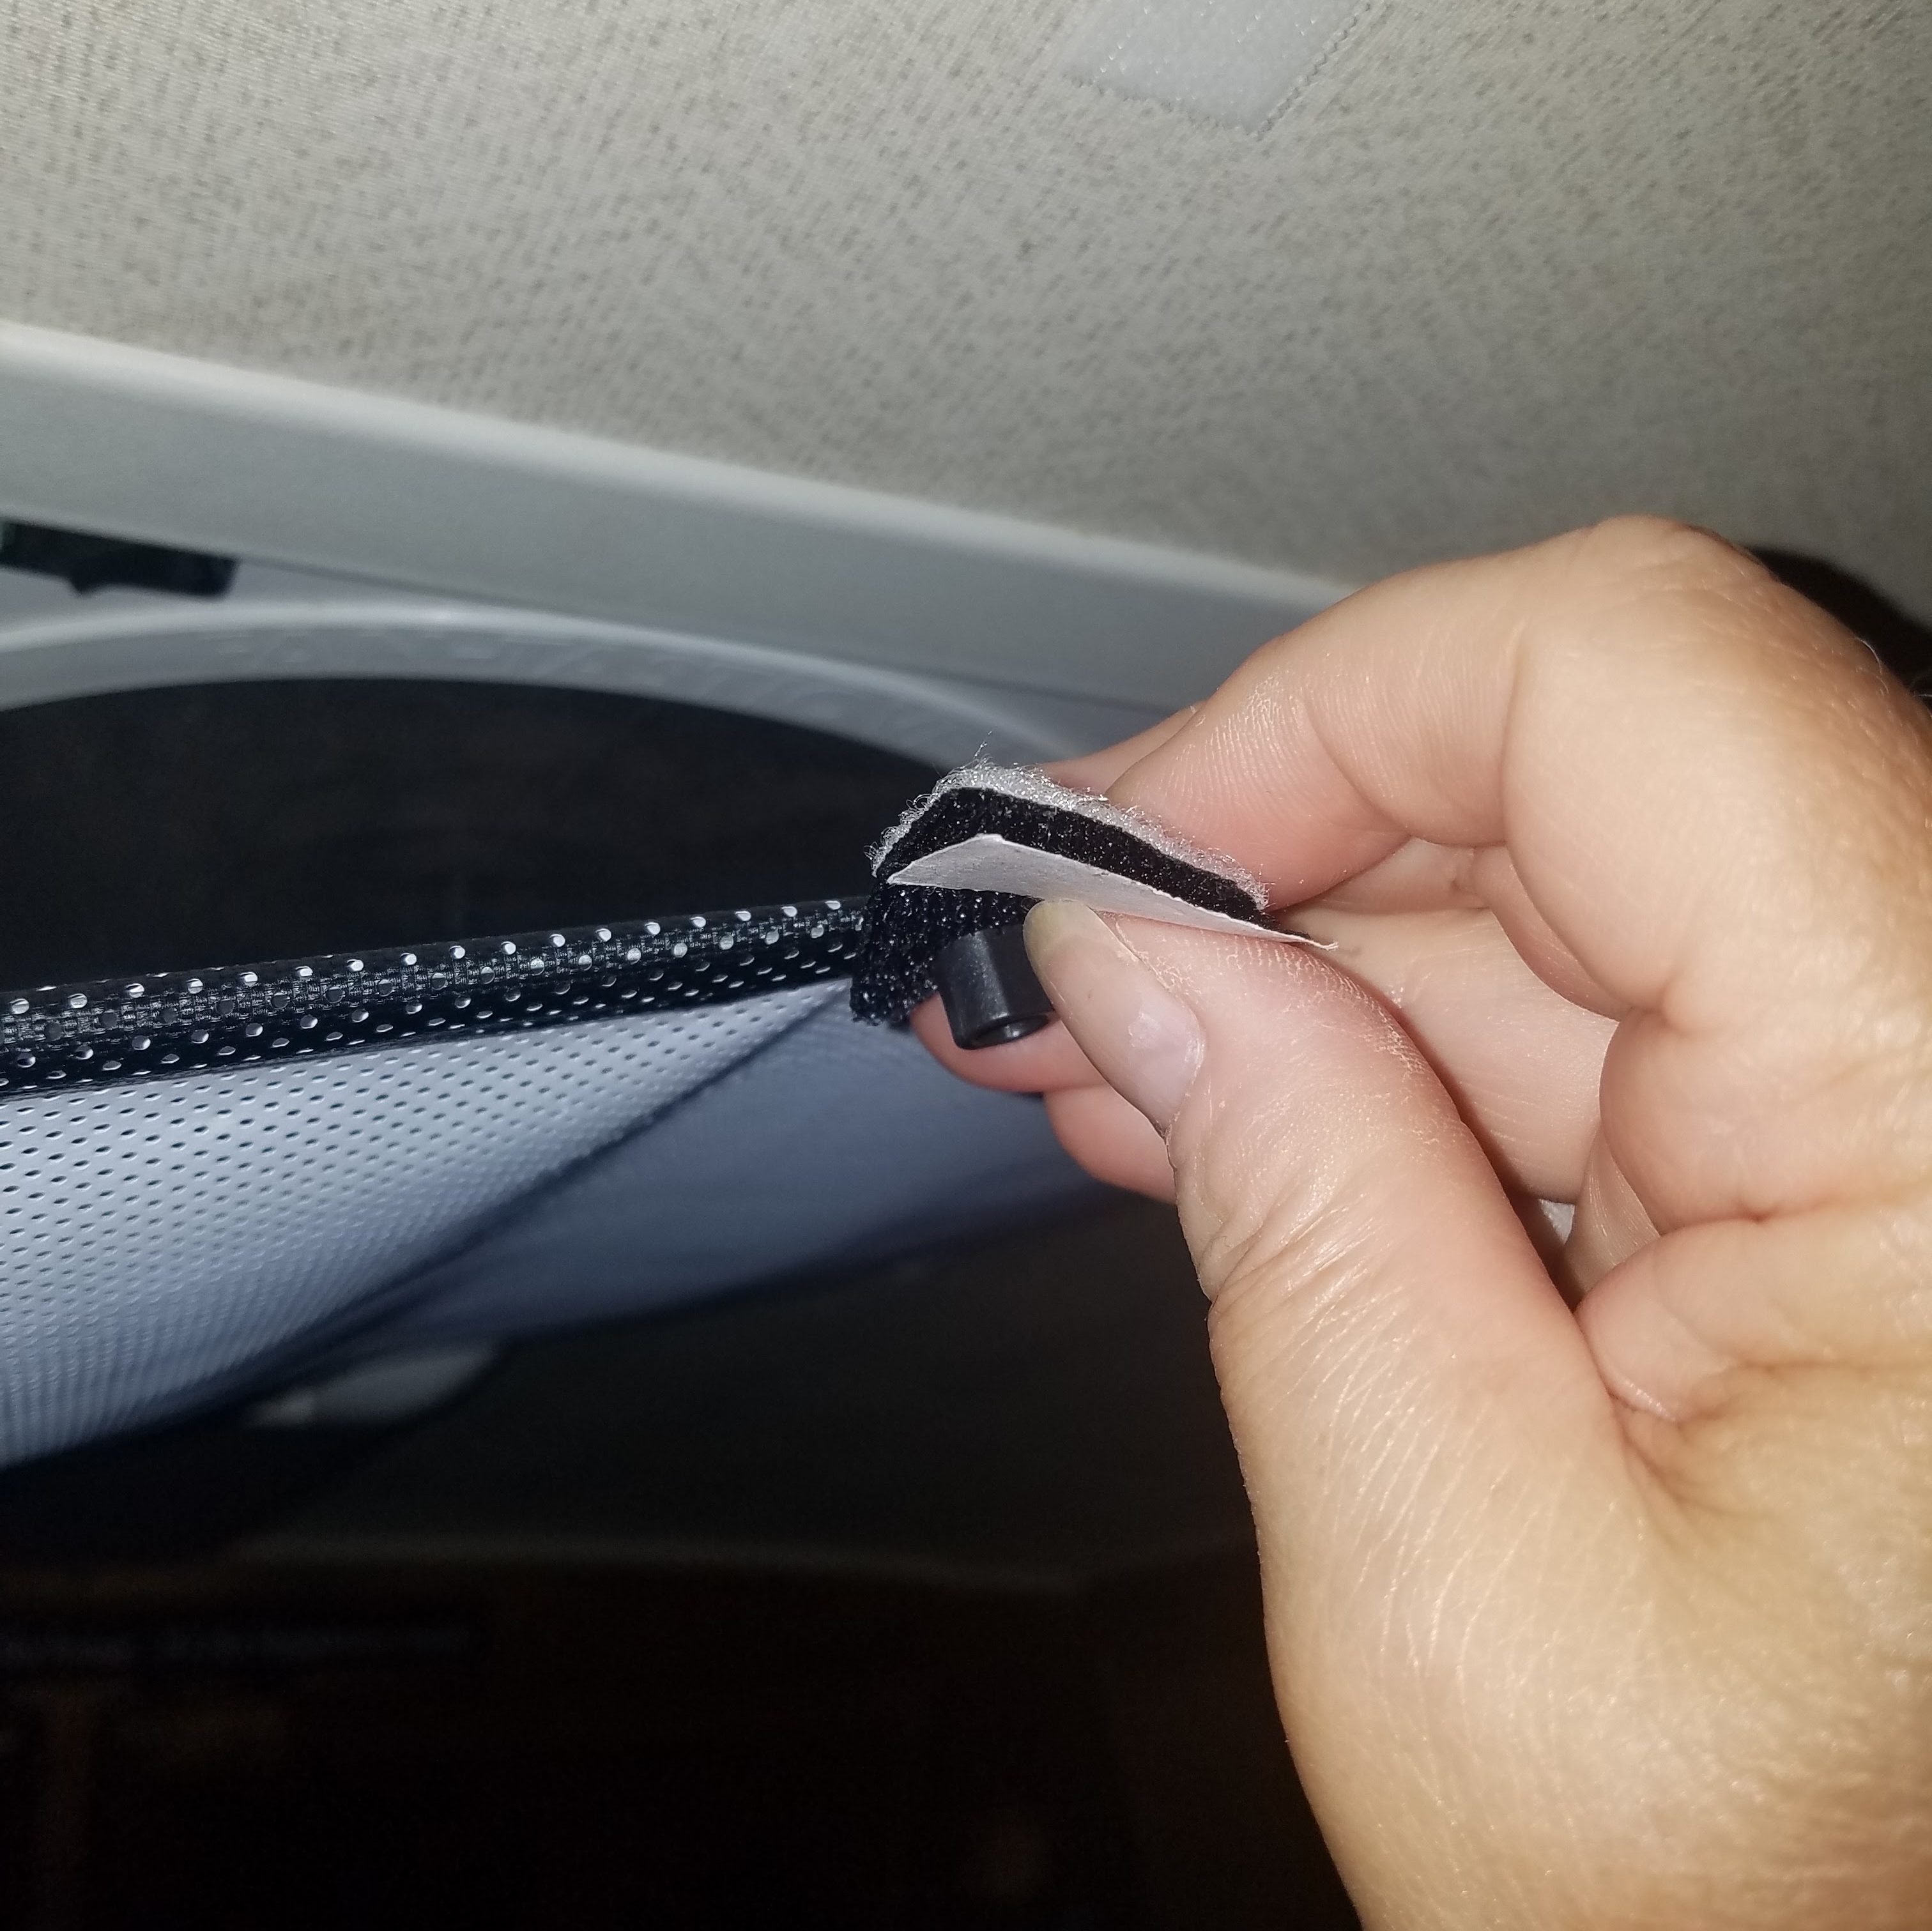
When I work with velcro I match up the two parts of the velcro first, then remove the clear plastic sheet to expose the sticky side on one side- afix into place where I want it. On this project that was all done on the kitchen counter. Then when I am ready to install I peel off the clear plastic protector on the other ends and push entire thing into place. This method takes the guess work out of trying to line each piece up properly.
This cut off end will be attached to the rear edge of the vent shroud trim piece. I did not use removable velcro squares but you can find them in 3M product lines, though they might be rectangular and thinner- they will work. The mesh piece is not heavy so HD velcro is not needed. In the photo below you can see the 3 sets of pairs of velcro.
NOTE: I chose to put the black side of the mesh towards the roof vent. I felt that having the white exposed to our bedroom would make the mesh far less noticeable on the ceiling –as I plan to just roll it up and stow it on the ceiling. If you prefer, with using the velcro squares it is just as easy to take down completely when not in use- but the velcro will wear out quicker. The instructions on the package if used in a car application said the white to the outside, black to the inside of the car.
When you go to install the velcro squares to the fan trim piece be sure that trim piece is really clean. Ideally clean with a little rubbing alcohol first, and dry to ensure a great seal of the sticky back velcro.
Next step for me was to hold those velcro tabs in place a bit just to ensure they are well bonded to the plastic wide fan flange. I let the mesh hang for about 15 minutes as part of this process.

Next step was to hold up and extend the shade, using the original tab on the end that has the bar reinforcement in the hem. I held it up as taught as possible but not so tight to put pressure on the 3 sets of velcro on other end nor to obstruct or push against the rotator motor that hangs down.
Once I found that right point, I installed one more sticky back velcro square to the ceiling and one to the top side of that tab so the mesh would stay in place covering the vent screen area. There is still plenty of “air space” gap on each side so that the vent works properly. Using velcro here makes it easy to open the mesh to take down or to make adjustments on the fan controls if necessary when mesh is deployed.
Pictures of the complete install are below– Since the white side faces down and it is so light weight, I rolled it up and secured it with two blue laundry clamps, like clothes pins that I had handy. I will buy some small white ones to use permanently. As it stands right now, we plan to keep the mesh rolled up and on the ceiling and unroll as needed. Not the prettiest of hacks, but we believe this will surely solve the problem of sun beams on our face!
Total project time, about 15 minutes.

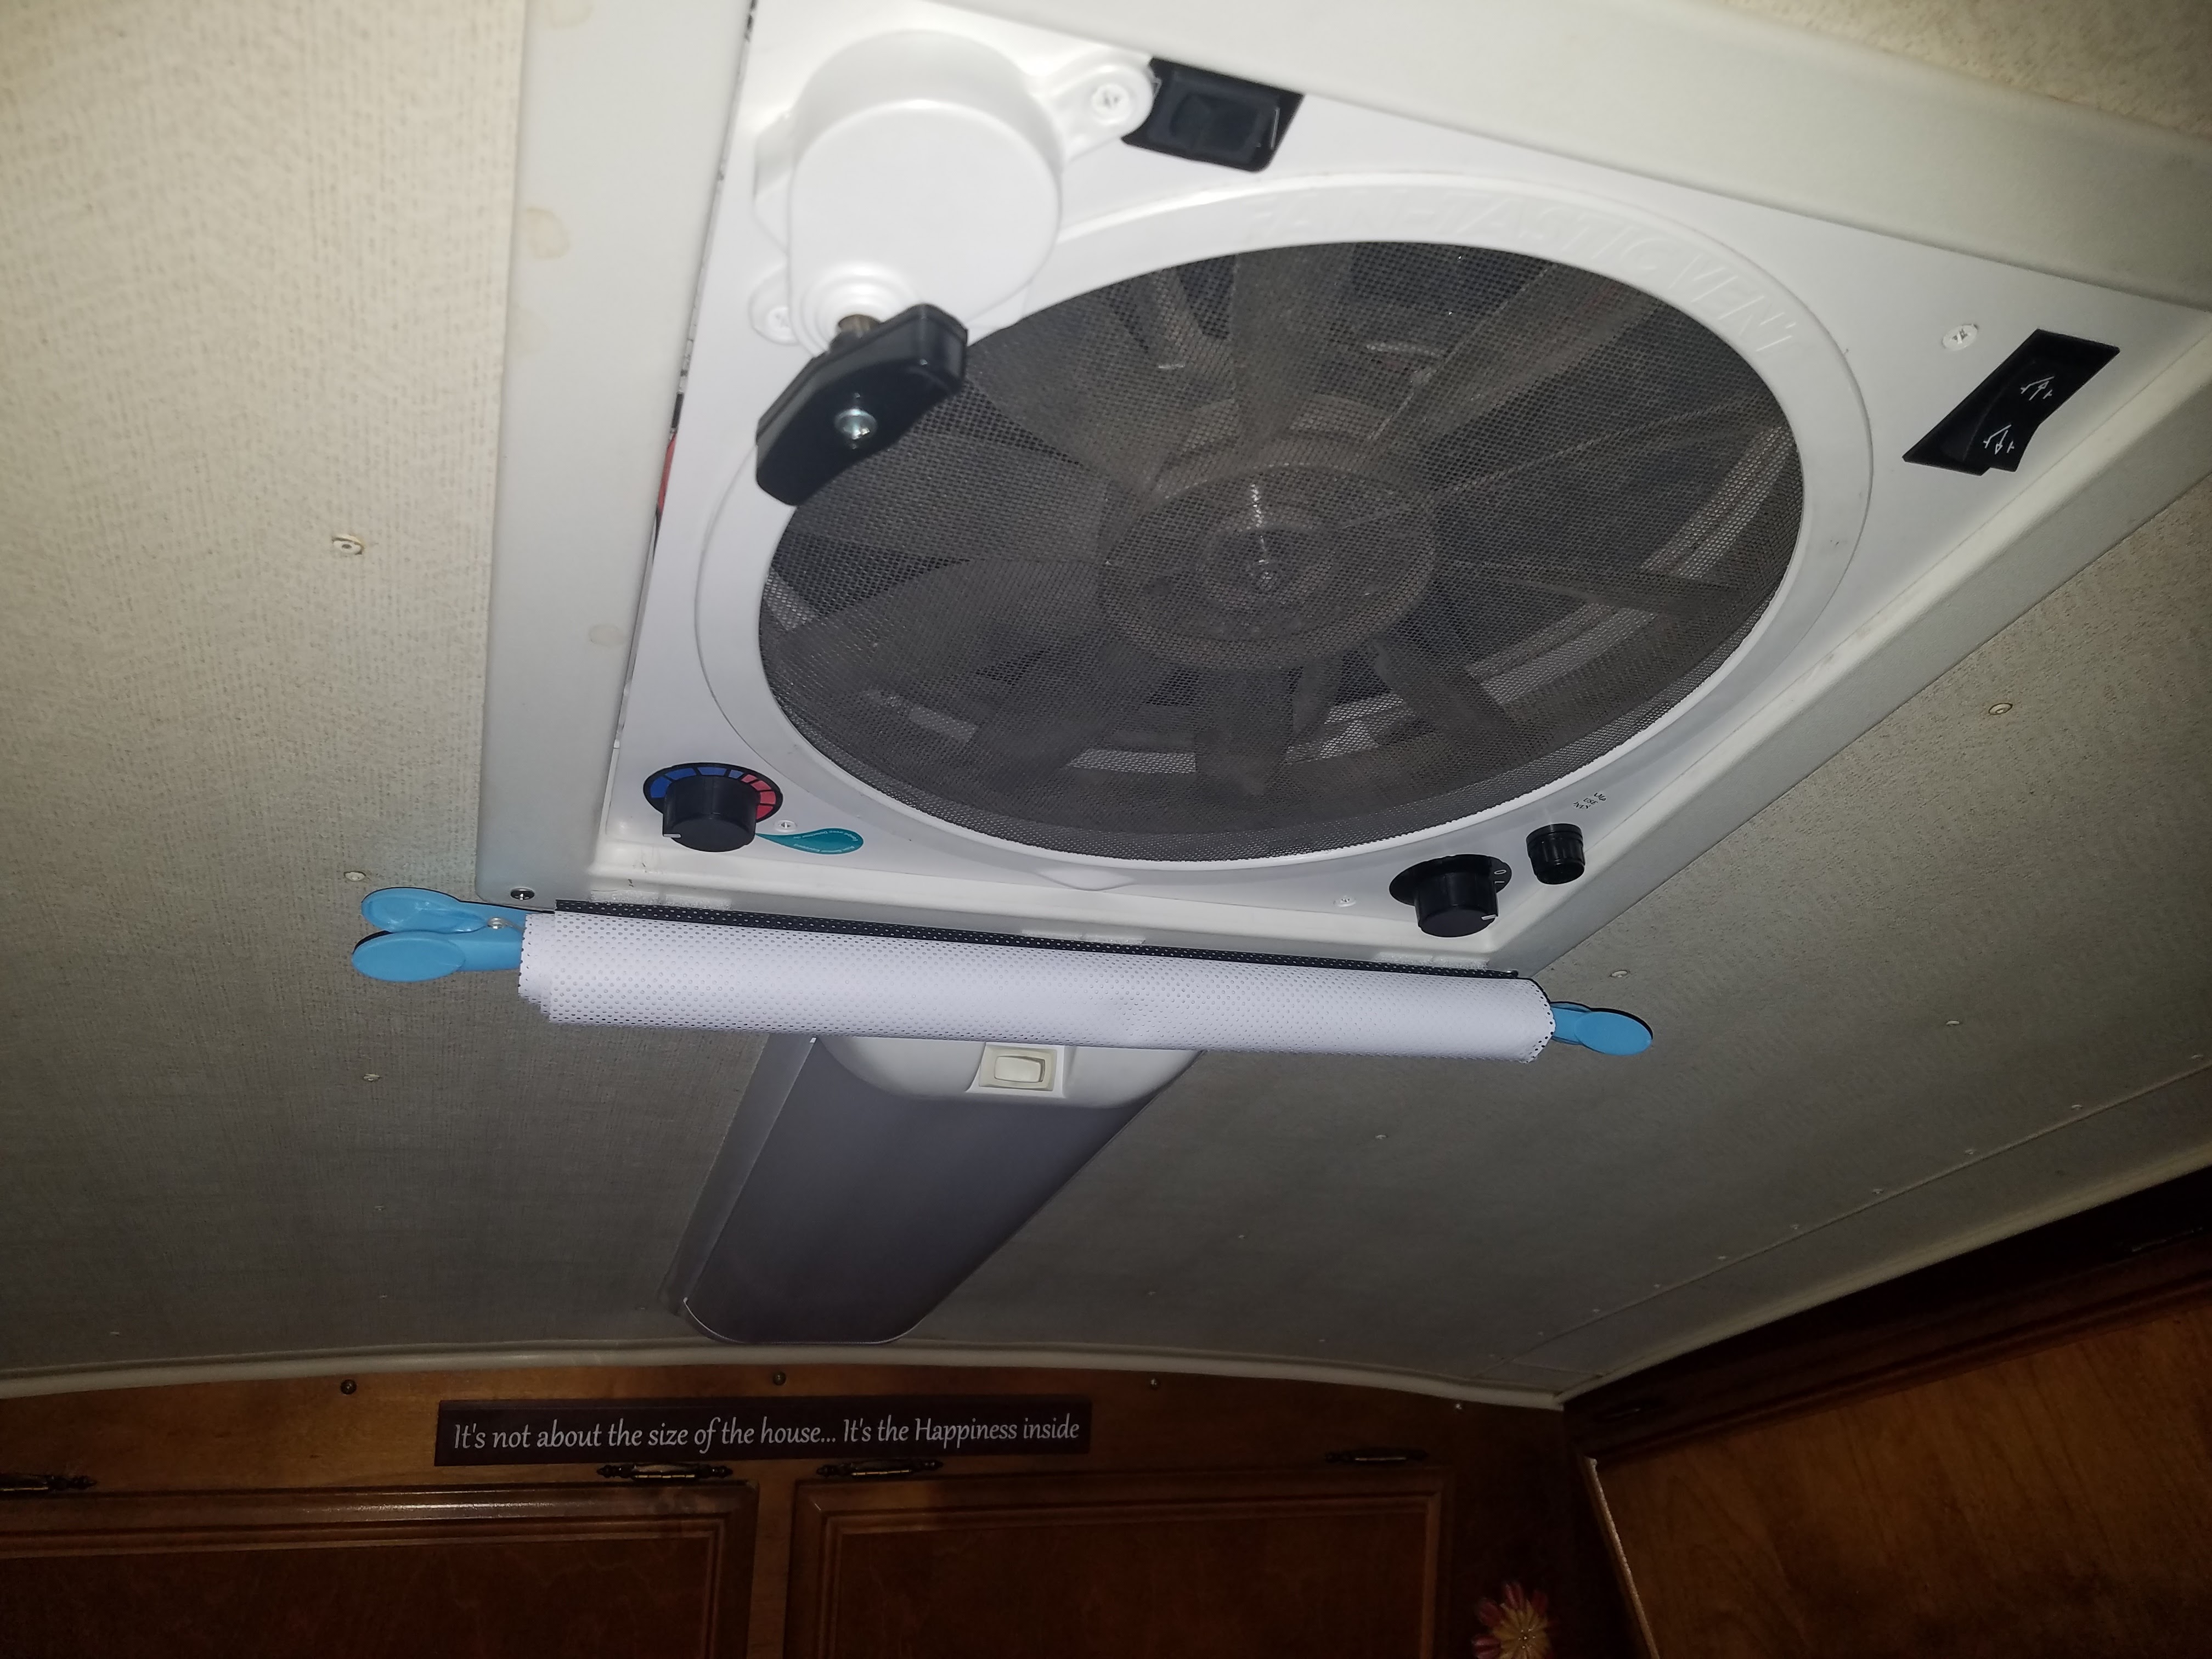
I will replace these make do blue clips with smaller white ones soon!
Materials needed:
Pull down style car window sun blocking mesh screen
Scissors (to cut off retractor bar end and trim mesh if needed)
White Velcro sticky back squares (3M makes removable ones too!)
If you do this project, please let us know and post pictures of your own to inspire others!!!!
As always, stay safe, have wonderful journeys and hug your Avion!

Leave a comment