We love our Avion, but lets face it, at under 200 sq. feet there is precious space for everything! Our kitchen is no exception. By the way….did you know that in some of the original sales brochures we have seen for ’70’s era Avion’s they called the kitchen/galley the “entertainment center”! What a hoot! I figure that is because many women during that time were stay at home wives and mothers and spent a lot of time in the “kitchen” so when it was time to get away in their Avion and travel they were “entertaining”, not slaving in the kitchen!
So back to our project! Our front area had been altered from a jack knife sofa to a banquette dinette area by the previous owner as I have mentioned in previous posts. So we were without the small angle/corner cabinet at the end of the kitchen counter area to the right of the kitchen window. We have found a perfect (love it!!) covered ottoman/box (see photo at end of this post) that serves as storage, a footrest and as a spare seat if needed inside or outside. But the ottoman is low and does not help with needed counter space.
Items and tools you will need:
- wood snack table that measures no more than depth of your base cabinet
- pencil or marking device
- paper for hinge template
- locking hinges and screws (be sure they are not too long and would poke through tray table top!)
- scrap board for backing support
- power drill and screwdriver
- tape measure
- small level
- A “helper” helps!

DEAD SPACE is ABOVE
I had seen on many other RV videos where many B+ and others have installed the flip up extension to their counter with locking hinges. I decided that we no longer needed four wood snack tables at our apartment (just two of us anyway!) so I decided on re-purposing a solid wood snack table top for our Avion’s kitchen counter extension.
I purchased two of the brown locking hinges at our local Albany RV supply store for under $10 each. I like the way the brown blended into the cabinetry and also the fact that they are lockable is very important so once the extension is tilted up and deployed it stays put. Be sure when you are installing them that you are putting the correct long side on the top so that when you want to fold the table extension back down you are gently lifting up a little to disengage the lock and then lower the extension. I have found some similar on Amazon, linked here but the locking mechanism is a bit different than ours. There are plenty of types and colors available on Amazon but oddly, no brown. I like our brown with our trailer.
We used the side that shows on top in photo below as our “top” which got secured to the underside of the tray table top.


Tray Table Stand: After gathering needed supplies we proceeded to un-attach the wood snack tray top from its wooden scissor “X” stand. Our snack trays had been purchased from Walmart years ago but I believe they still have them. Going onto Walmart.com now I see only sold in a four piece set with holder for about $60. But I believe our local Walmart store sells them in person as singles and price is under $10 each. Here is a link to one on Amazon that is similar in style to what we used in case you want that as reference.
Once tray top was on its own we decided exactly where to locate it on the base cabinet end wall. This wall is solid wood (Avion cabinetry is gorgeous and real….no particle board on these beauties!) but nevertheless we still will put a scrap board behind to give the screws/hinge/extension table and this cabinet board further vertical support. I decided not to try to make the extension flush with the kitchen counter. This is both for aesthetics and to be able to keep edges clean, but also because I did not want to risk the tray extension ending up even a tad higher than the counter when we were fixing in place. Below you can see the horizontal pencil line which we marked while laying the extension against the cabinet base wall. Also note the pilot holes drilled after positioning the first of the two hinges. (you can see faint remnants of a line where the original corner cabinet was installed a little further down)

Below are photos showing the scrap board we used behind where we would be drilling and then screwing in the bracket hinges. This provides great extra support. The scrap wood does not impede the drawers from closing. Be sure to use a thin enough piece so the drawers still go in but sturdy enough to be a reinforcement for the hinges. Use your measurements on the outside to then draw your measurement/placement for the scrap wood on the inside of the cabinet wall.


Use your level to ensure you are positioning the hinges level so that your extension is level too! We did pilot holes through the cabinet base and directly into the scrap wood. This is where the helper comes in because someone has to hold the vertical scrap boards in place while the hinges are being drilled in. You can use double face tape, etc. to hold them in place if you do not have a helper.
In order to be sure that we had the position of the holes for the hinges correctly placed on the underside of the extension table, we made a paper template up.


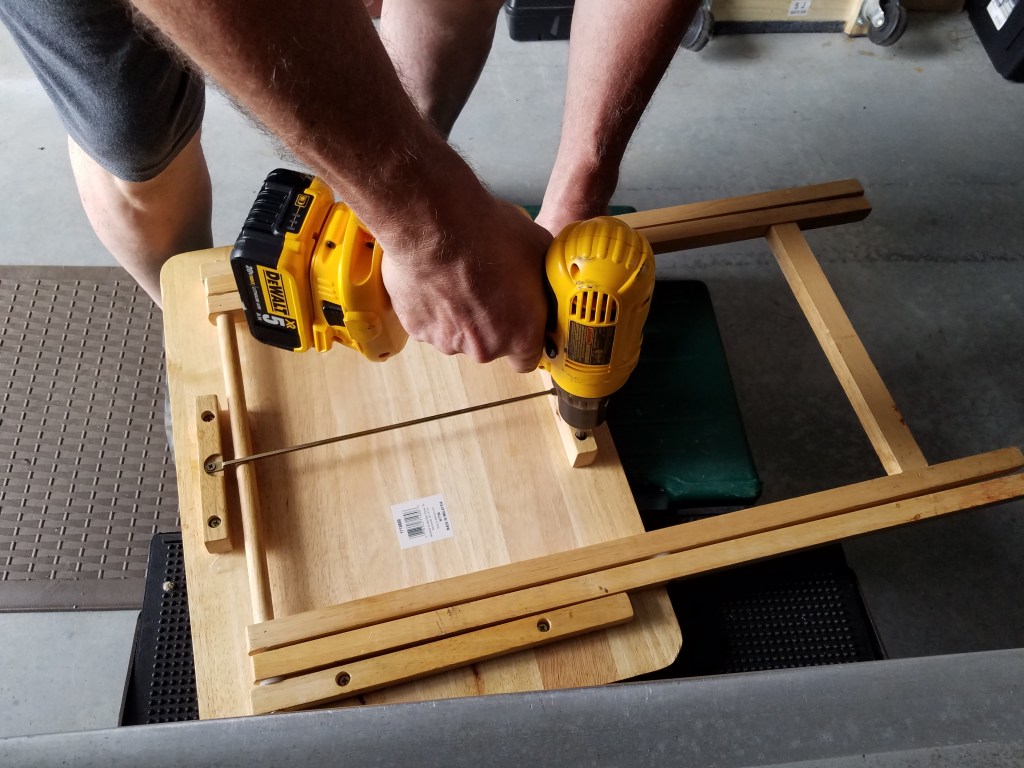
Once the hinges are on, and you have your template ready, you are ready to drill pilot holes into the underside of the snack tray table. Here is a great trick (see video below) Kevin used to be sure that he did not drill into tray table any further than needed and poke through the top by accident. Just a little strip of duct tape put around the drill bit at the bottom most measurement needed for the screws so that the screws would secure through the hinge and into the table extension without poking through.
Once all pilot holes are drilled, once again here is where a helper comes in handy. Place the extension tray table top onto the first hinge. We started with front most hinge and insert screws from underside and up into the tray table top. Then do back hinge. It helps to have someone holding onto the tray table and exerting just a little downward pressure on the extension table top to ensure a good bond.
What I like most about using the already finished tray table is that it gives an immediate finished look unlike if you just slapped a pine or square sided oak board there. These tray tables are built to handle dishes, water, food being dropped on them, beverage glasses sweating onto them. They are pre-finished, solid and have held up for over 10 years and still look nearly new for us!

Here is a photo (above) of the finished project with the extension down. You can also see we measured and positioned it optimally so that it did not impede me being able to pull out and get into the storage ottoman either. We are really, really happy that we have just DOUBLED our useable counter space for the cost of under $30 and about a half hour of project time work. Can you tell by the video that I am really excited!!
Let us know if you take on this project for your RV so we can post it on our facebook page and share your results with others to inspire them!
VIDEO OF THE FINISHED PROJECT! SO EXCITED!!
Safe journeys! Remember if you do this or a similar counter extension project let us know!
—Luisa and Kevin
1973 Avion, LaGrande, 28 foot
“One Life… Live it!”

Leave a comment