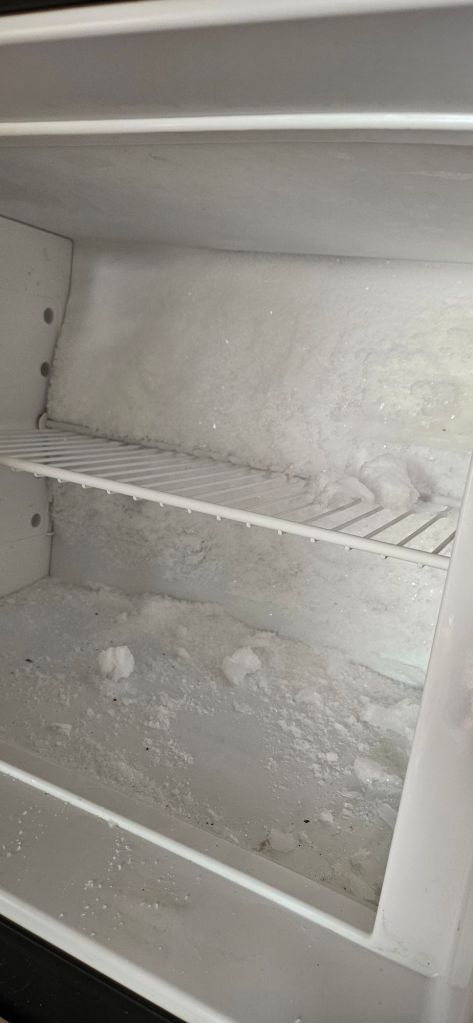
Well, it happened again!! Actually, in truth, we have actually only needed to do this “household” task 3 times in the last 2 years!

IT’S DE-THAW TIME FOR THE DOMETIC 6 C.F. FREEZER!
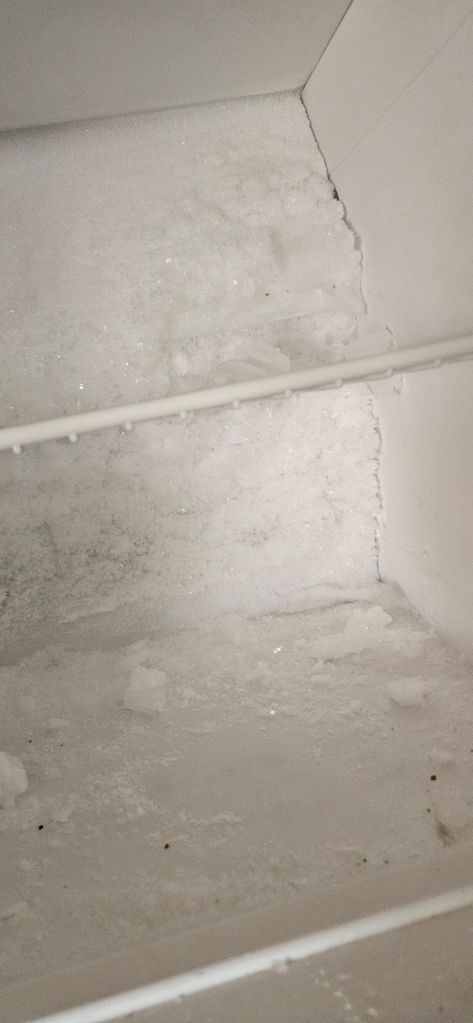
(Based on the thickness on one side we were overdue by a couple of months)
Anyway, here are some valuable tips to keep your RV fridge and freezer running optimally and quick tips to defrost the freezer when ice crystals have built up, especially on the back wall of the freezer.
**Please DON’T ever let it get to the point where those ice crystals encapsulate your frozen foods. Then you really, really have been a neglectful parent!
Defrosting Tips:
What equipment you will need:
1) A bowl, small bucket or in our case we use one of those Rubbermade rectangular Ice buckets mean to store loose ice cubes in the freezer.
2) a small portable fan, can be plug in just be careful!
3) a rubber or plastic blunt edged spatula, scraper or similar. NOT metal or anything with sharp edges please!
4) Clorox wipes or other disinfectant for the after defrost wipe down.
5) A insulated grocery bag that can be zipped or fastened closed well. (we use our insulated one from Trader Joes)
6) Paper towels and / or sponge.
Steps to do a Quick Easy Defrost:
- Place all your frozen contents into an insulated bag and set aside.
- Turn off the RV refrigerator. If you have controls just for the freezer, you can just do that.
- Place the portable fan on the outside flat edge of the freezer compartment with door left open. Allow fan to blow into freezer box. Hold fan if needed and do not let any ice or water near fan. Ours took literally about 10 to 15 minutes to become soft enough to gently lift away the built up ice crystals with our plastic spatula.
- Continually watch and mop up melting water with sponge and or paper towels as needed to keep floor of freezer as dry as possible. Unlike home freezers, your melted water will collect in the freezer box as there is no drains. *Only the refrigerator section has a drain for condensation build up.
- You can put larger chunks that may come off into your bucket.
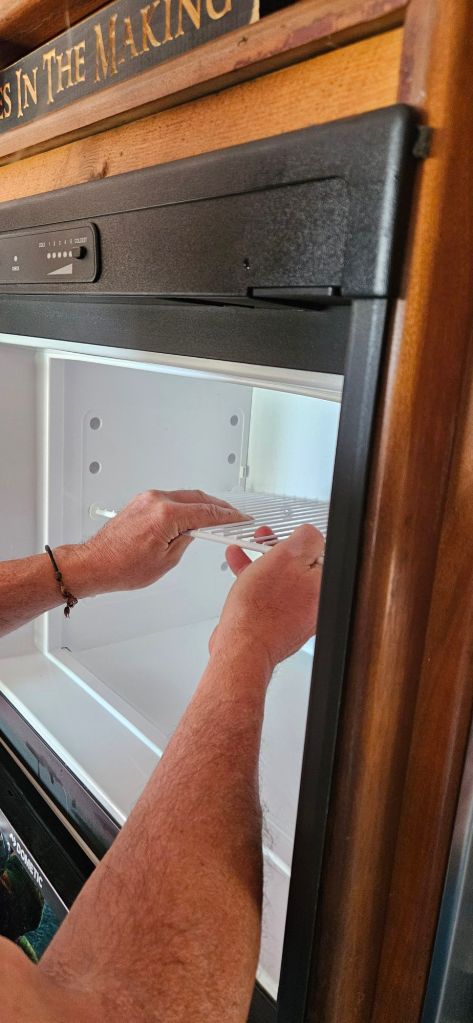
- After all the ice is removed and freezer area dried off with paper towels we go back and wipe all surfaces with Clorox wipes or diluted bleach water.
- Put your frozen foods back into the freezer. This helps being the freezer back up to coldness more quickly.
- Turn back on your RV refrigerator to the highest setting for a little while, maybe an hour or so to quickly cool back down the freezer.
- Be sure to inspect and wipe around the door seals too!
General Rips for RV refrigerator care:
- Do not over fill your freezer or fridge space. 2 (LP and electric) or 3 way (LP, 12V battery and electric) refrigerators need air to be able to circulate around foods for best cooling and efficiency.
- Do not put anything in the small condensation water tray in the fridge that sits in front of the cooling fins. Also, check that condensation tray and clean periodically.
- Install a battery-powered or 12V RV fridge fan. They really do work! Follow instructions on placement. We had a battery one to start but went thru too many batteries. Kevin installed a 12V one, a pretty easy DIY.
- Be sure you hear that “click” of the freezer or fridge door when closing.
- Inspect all seals periodically and replace if needed.
- Remember, things on lower shelves will get the best cooling, because cold air settles.
- When camping in excessive heat and/ or direct sun on the side of your RV that refrigerator is on try to position that RV side to receive the most shade from trees or heat of the day. Install and extend a window style awning (we love Zipdee brand) on that side that extends over fridge area. Additionally, we will hang a tapestry or other breathable table cloth off the awning to totally shade our fridge area on the outside of our trailer if it is the time of year where the sun hangs lower in the sky (Fall). This really, really helps your fridge not to struggle, and you will use less LP or electricity too!
- Lastly, be sure to inspect your exterior fridge vent compartment for bee nests, paper wasps (they love LP smell), spider webs, dust, dirt, etc. Clean this area out, spray off the vent door, too.


Leave a comment