NEW!!!! RUB RAIL INSERT VINYL SUPPLIERS:

To get the proper look AND fit tightly into the metal track order 1.5″ width! Any narrower may go in easier but will be prone to popping out over time!
TIP: We have ordered sample lengths from each of the companies below. They have tons of colors to choose from- we strongly suggest ordering samples first. They both carry the exact same product and even their color swatches have the same # codes. Shop by price as sometimes one company is less than the other for the exact same item, or may be offering better deals on shipping.
Suppliers:
www.sunnilandpatio.com/collections/replacement-vinyl-strapping-by-the-roll
www.patiofurnituresupplies.com/vinyl-strap-rivets.html
RUB RAIL REFILL SOURCE For Avion Trailers
You need 1.5 inch wide for mid belly rub rail. This is the vinyl strip that runs around the midsection of the body. See note below regarding the lower, smaller rub rail. This vinyl patio chair strapping IS THE CORRECT stuff for this project. It is the thickness and width of 1.5″ is what a 70s thru 80s era Avion needs. The thin stuff used on modern RVs in their tracks is NOT the right stuff- however it can be used in 1′ width for the bottom rub rail.
SOURCES FOR VINYL STRAPPING:
Sunniland sells 16” lengths so it is advised if you are not sure which color you want order the colors in 26inch to see before ordering a whole roll.
https://www.patiofurnituresupplies.com/vinyl-strap-rivets.html
PatioFurniture sells sample pieces of color choices. The samples are only about 2 inches long.
Both companies sell the identical product. Even the color swatch numbers are the same. It boils down to pricing and shipping costs to your destination at any given time- one or the other may be having a SALE!
IMPORTANT NOTES;
We have not had to replace the lower rub rail vinyl in our 2 Avion’s but it does look a little narrower and may be 1”. If you need to replace the lower rub rail we suggest ordering a sample length first to ensure correct width. We did end up ordering the lower rub rail in 1″ from Etrailer. Installation is pending as of Oct 2024.
TIPS that have been suggested by fellow Avion owners for installation of replacement rub rail:
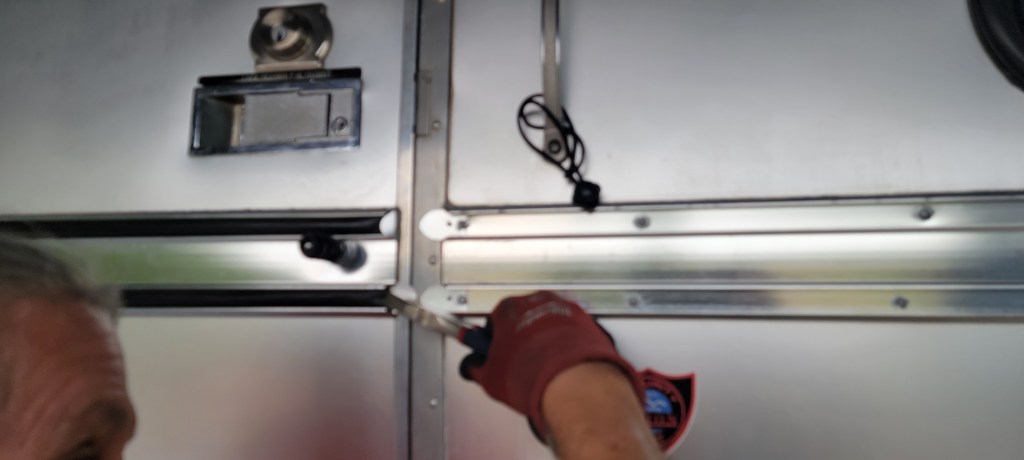
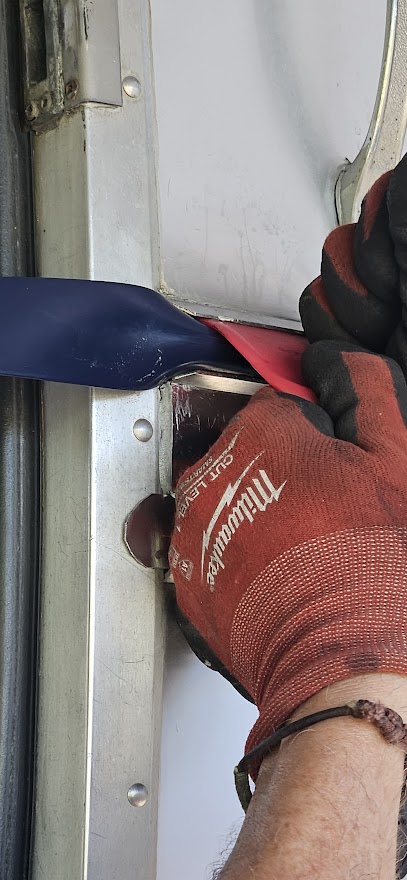
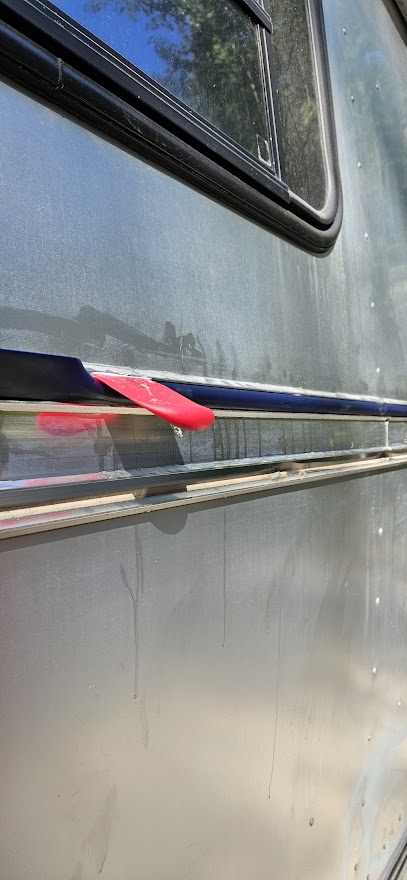
- Install in warm weather so that material is flexible but do not stretch the material at all when installing! Over time the vinyl material will shrink due to sun and weather, so you want to actually push back on the ends a bit to leave it as tight butted up to your beginning and ending points as possible. Two people is best, one to feed into the track and the other to pull it through. OR even better some have found they can insert it by pinching the warmed strap edges together and using a tool, perhaps a small hard plastic putty knife (or mixing bowl scraper- which is what we used!) to help push it into the track as you move along- thereby omitting the need to “pull it thru”. The latter may be the optimal way to insert.
- Using dawn or similar dish soap in the track or rubbed against edges of strapping may help it to slide into the tracks easier. We diluted a water and dawn mixture and put into a small spray bottle and used that. It helped somewhat especially when we were working in the shade and the vinyl was not as supple.
- We found using a stiff hard plastic mixing bowl scraper really helped to be a lead guide to insert the top edge of the rub rail in and then push in the bottom at the same time. Yes–we found the project really requires two people if at all possible.
- Start at one side of the door and work your way around in one continuous strap. Avoid seaming the product if at all possible (no seams in the original installs). Some have used a set screw to anchor the ends of each strap if your original triangular metal tabs have been removed or broken off. We had to make some new metal tabs out of a small aluminum sheet we bought at Ace Hardware.
- Be sure to put in some parbond, gutter seal or similar into any screw holes or rivet holes before screwing or riveting. This helps to provide from water penetration in the future.
- To maintain the suppleness of the vinyl it is suggested you go over it with a protectant like Armoral or T-9 Boeshield (which is also a great at least annual lubricant for your Awning hardware). WE USE: 303 Aerospace Protectant https://www.303products.com.au/product-range/universal/303-outdoor-protectant (this is what we use!)Avail on Amazon.
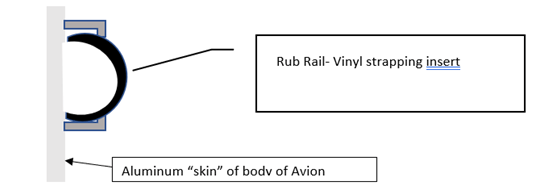
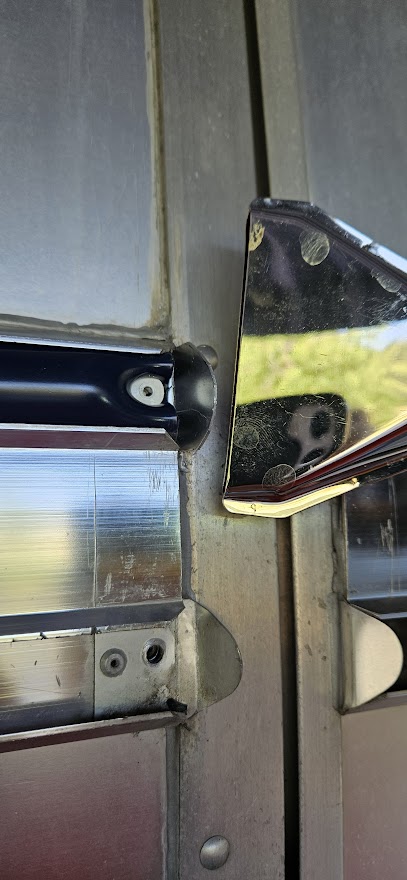
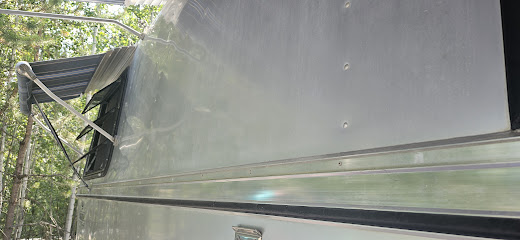
- We have had to use a heat gun to warm our vinyl strapping and used a pair of pliers on one end that is used to help pull it thru the track. It should be a tight fit so that the vinyl stays in place though. See diagram of the correct profile below which is achieved with the 1.5” width of strapping. This matches the original install best.
- HERE IS WHAT THE SIDEWAYS PROFILE OF THE RUB RAIL SHOULD LOOK LIKE WHEN INSTALLED PROPERLY:
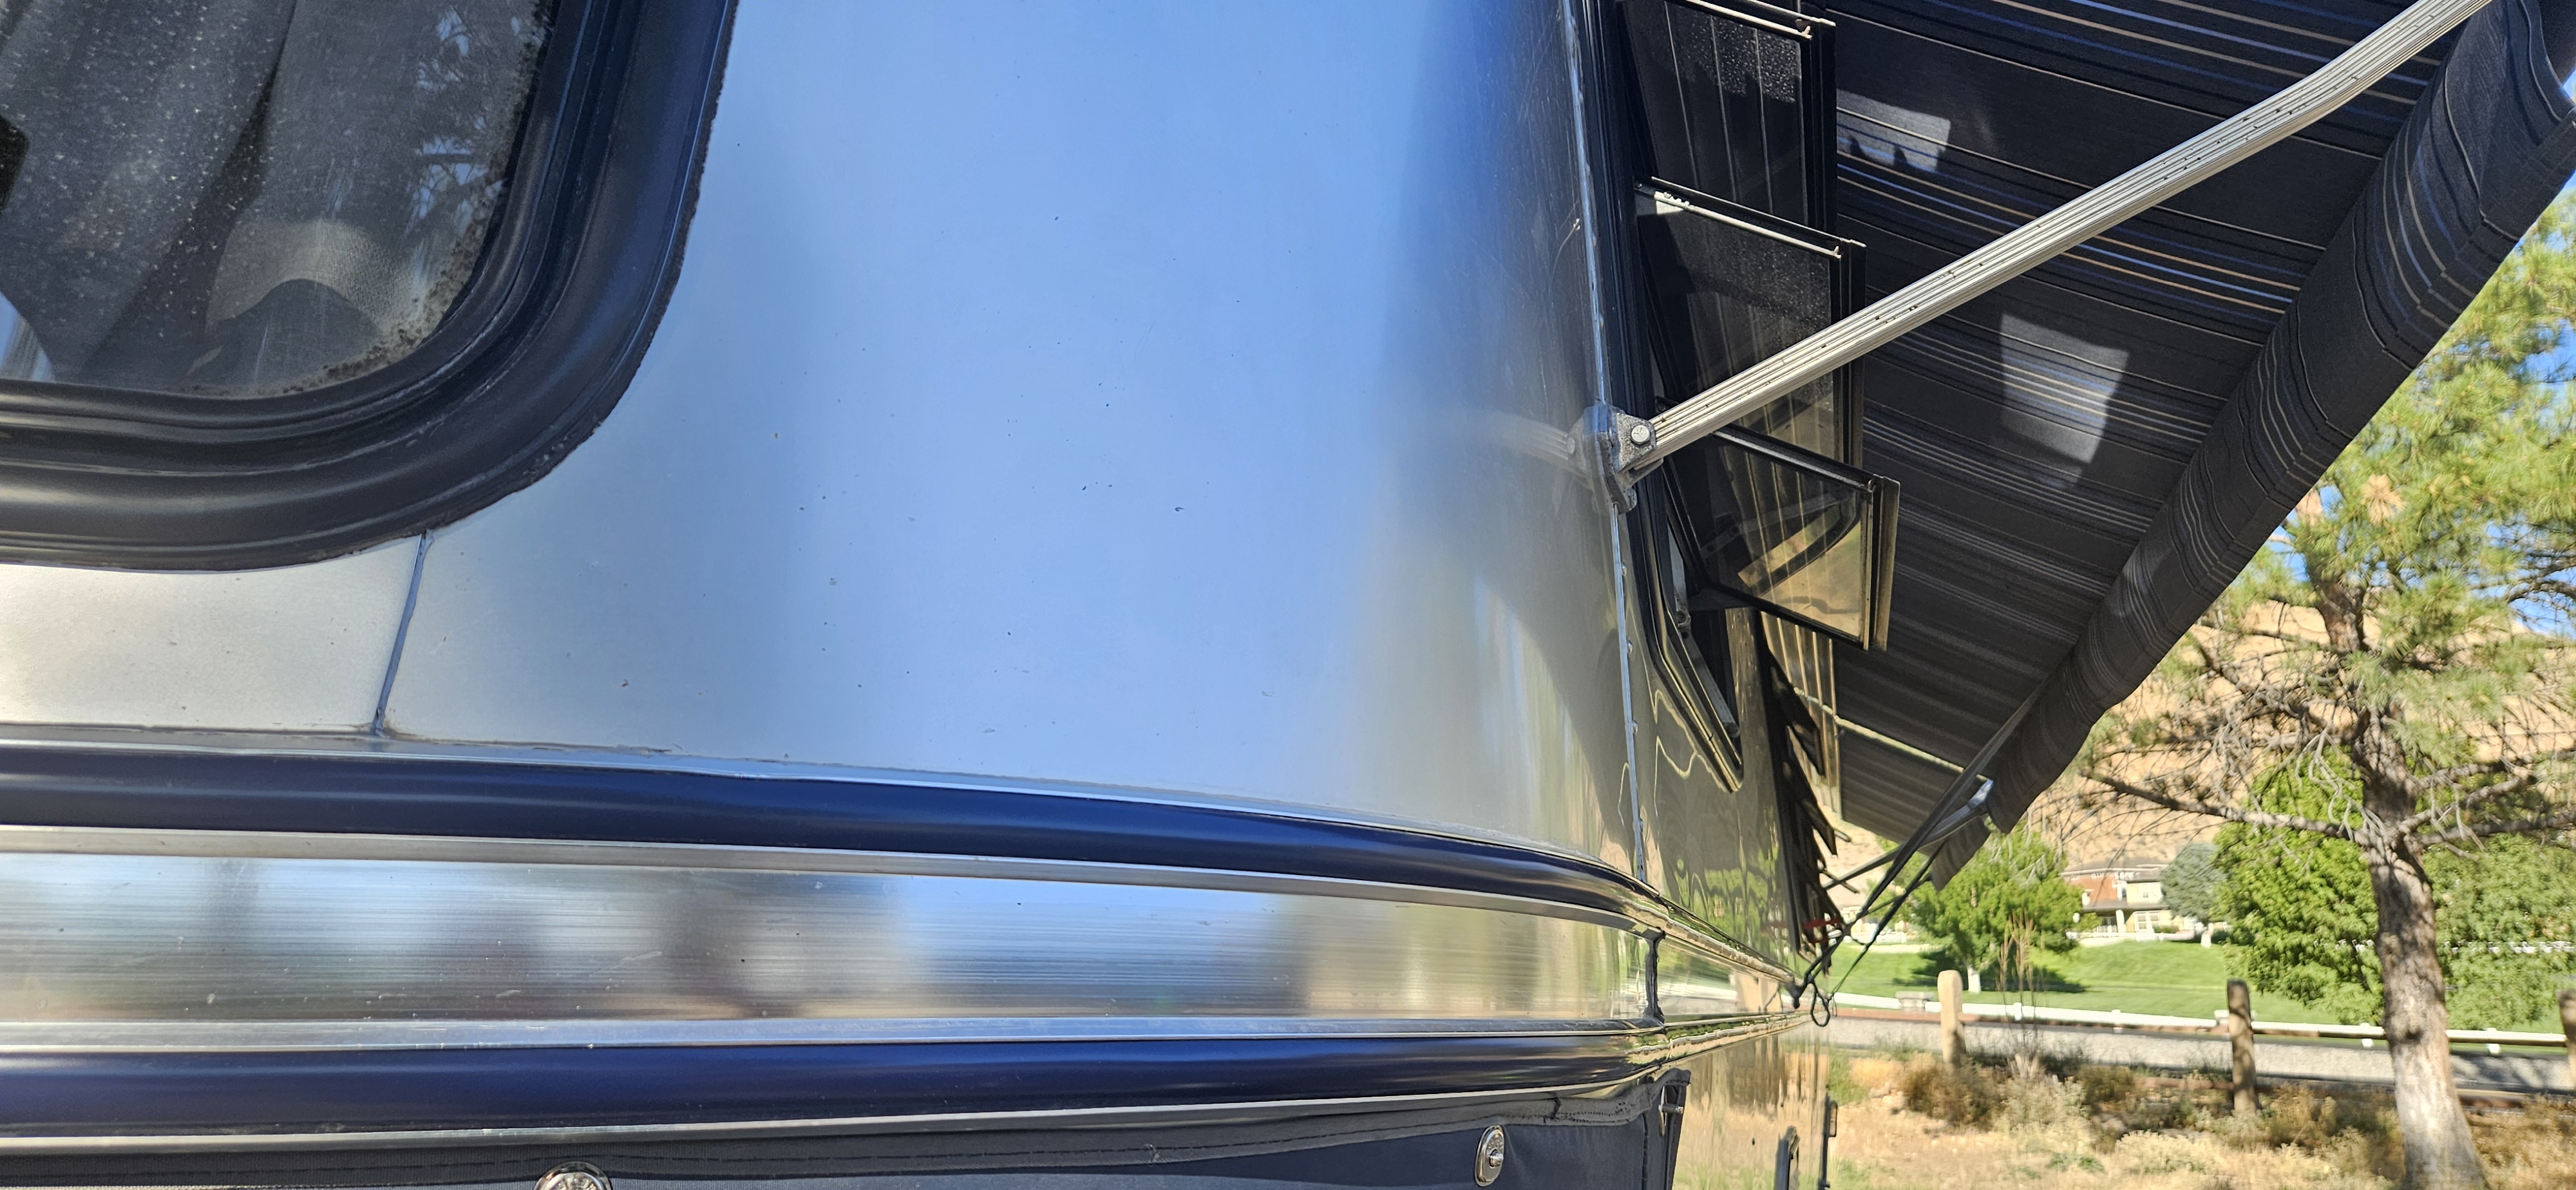
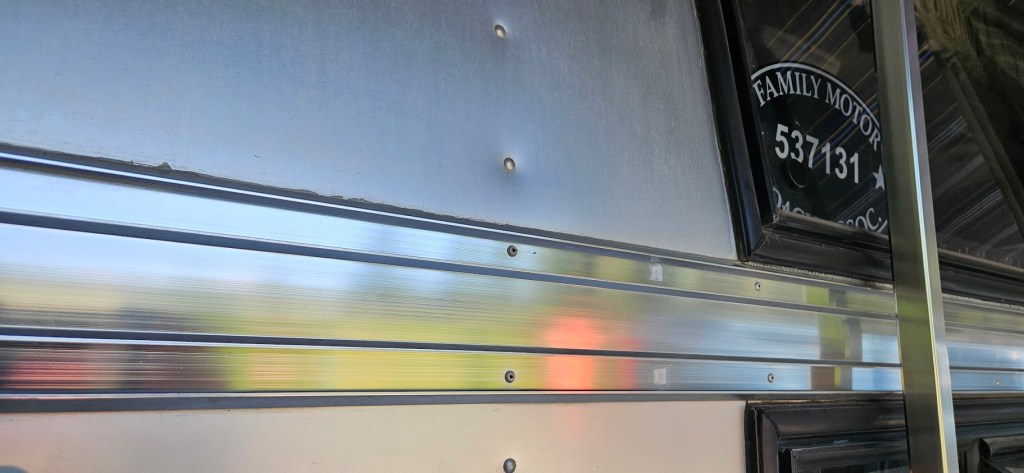
HERE IS A PHOTO ALBUM OF OUR RE-DO OF THE RUB RAIL ON OUR 1987, 32S. We used the NAVY color 1/5″ patio chair strapping and it looks AWESOME !! It took2 of us doing in about 16 total hours.
First the finished project! (note, we left the original BLACK rub rail in our door sections since our awning is both blues and black, and it was in very good shape.


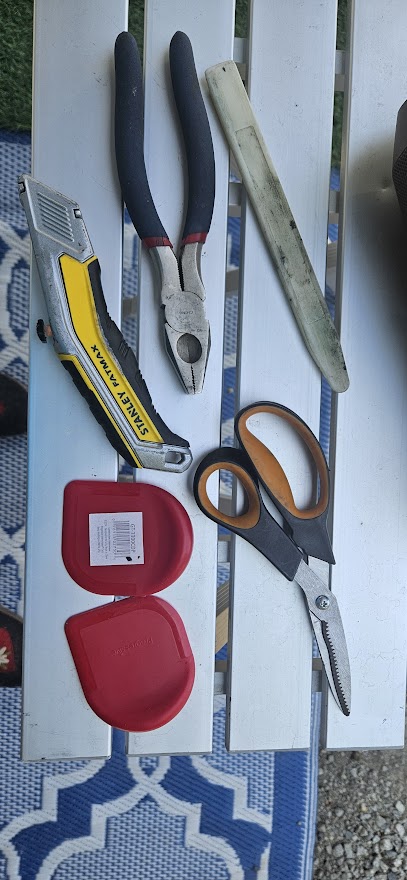

Here is a very quick video showing how Kevin used the hard plastic bowl scraper (can be found at most kitchen supply sections of Walmart, or in a kitchen specialty store. For slightly longer videos on this project please visit our YouTube Channel.
We hope you found this blog post helpful! Let us know how your project turns out! We would love to hear your feedback!
Wishing you happy & safe travels!
Kevin, Luise and Nutmeg!!

Leave a reply to pewterpalace87 Cancel reply