Black & Grey Tank Projects
-
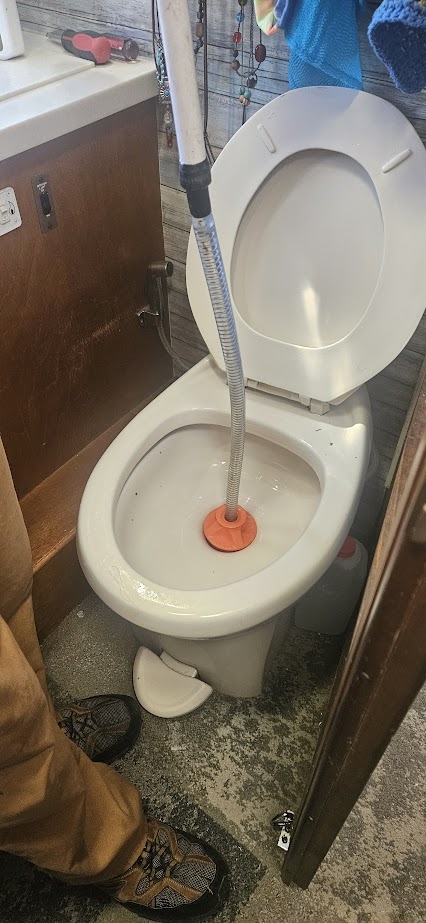
Spring Cleaning PT 1: Toilet and Sink Drain Pipes
Concise steps for maintaining clean black tanks, RV toilet, sink drain clean outs and more. Resource…
-

Grey Tank Lessons….
Great info on RV grey tank maintenance, tips, links to where to purchase replacement holding tanks-…
-
Repairing our black tank-leaks!
UPDATE: the repair we paid an RV shop ($600) to do only held for 5 months. …
-
Fresh Water Tank Sanitizing & Water Fill Sanitation
There are some slight variances depending on full timing versus vacation RVing. These are procedures and…
-
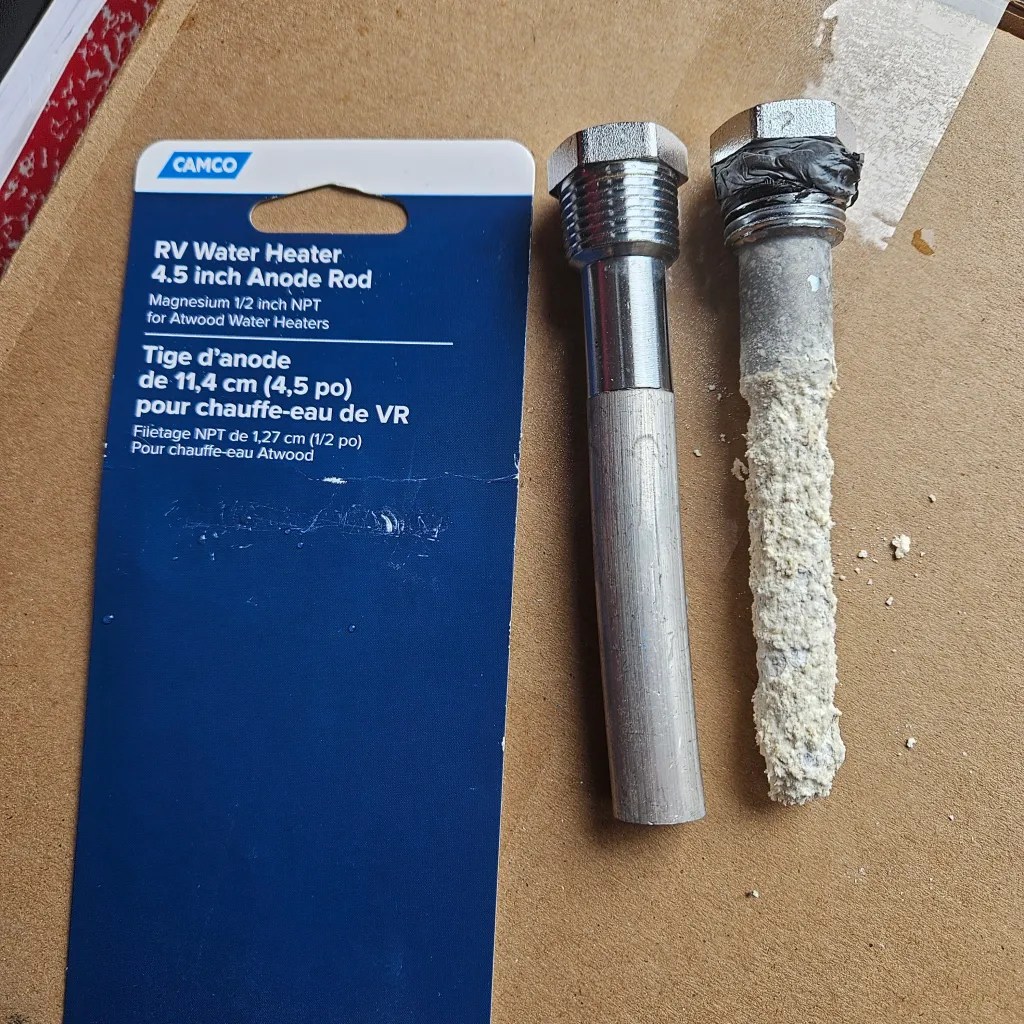
Hot Water Tank Maintenance- the FLUSH!
Quick tips on maintaining your hot water tank in your Avion.
-

Drain Pipe Gunk Build-up! How to Clean and Prevent YUCK!
There is NO telling how long it has been since our kitchen and bath pipes have…
-
Even in Sunny AZ – Our Winter Requires Some Weatherproofing!
Here we are in sunny AZ in winter, but whoa it is still cold and even…
-

Fish in My Grey Tank??
Fish is NOT what I want in our grey tank! Can you imagine the stench on…
-
AVION Trailer- New Black Tank Installation, 2022-Tips, Sources and more!
A little background to this story.…..In the summer of 2021 our original black tank had a…
-
RV Fresh Water Hook up Safety Tips
Great tips on How to keep your RV fresh water safe.
