
Welcome to the Pewter Palace!
Our Love Affair with Vintage Avion Travel Trailers!
This website is a chronicle of our travels, our repairs and upgrades to both our previous 1973 Avion and our “forever” 1987 Avion. It is also our way to share this information with others to help them on their own
AVION JOURNEY!
NOTE- this new website format is still under construction! We apologize if finding things is a little tough right now- we aim to make navigating to find useful info easier in the long run! Please give us a little time and come back for a visit!

Our Annual Travel Logs by Year (coming soon!)
Want to see where we have been? or where we are going this year?
Our most frequented pages are below….
For our most RECENT blog articles in chronological order scroll down page
Avion Trailer Renovation and Upgrades
From suspension systems, enlarging bathroom, to repairing windows. This section has a library of projects we have done and includes links for supply resources, tips, video links and more!
Continuous Support for Avion Owners
Easy access lists to our large list of items we use regularly in our maintenance and repair tool kits to items we have found super useful on RV travel and living small!
Avion & Travelcade Club History and Archives
Great information and stories on the history of the Avion Corporation, the Travelcade members club as well as links to archived membership directories to help research the “lineage” of your Avion travel trailer
So You Want to BUY an AVION?
We include our personal Avion Inspection Check List (printable PDF) to take along with you when you begin your search for the perfect Avion for you! Great info….and tips on when to walk away!
First Time Avion Owners Guide
You have bought your first AVION!! Congratulations…..Now What? We review basics on care of the exterior and interior, links to social media sites to find the online Avion Community family and more!
AVION Swag!
In 2019 we created an online store with our exclusive, artist designed Avion logo items and giftware/clothing for all lovers of aluminum RVs. There is something for everyone and all ages of Avions from the 50s through the 80s! (did you know there was a huge design change in 1973?)
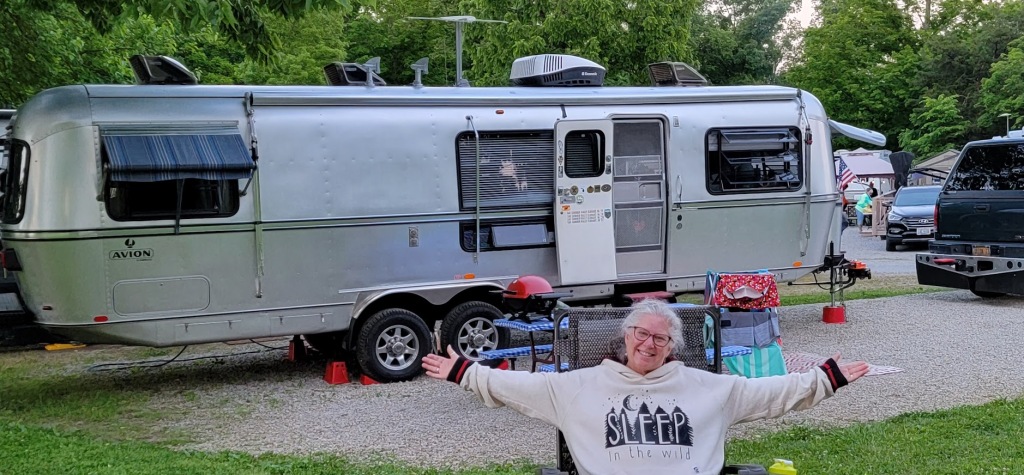
Living Life, Full Time in a 1987 Avion
We began living and traveling full time in our 32 foot Avion on May 1, 2023 after Kevin retired. Our journey leading up to that point is a story itself- and along the way we have learned tips about downsizing, living small, and about eek-ing out storage where you can find it. Many of our blog articles deal with this transition. Scroll down to see our most recent blog posts and subscribe so you get alerted each time a new post is published!
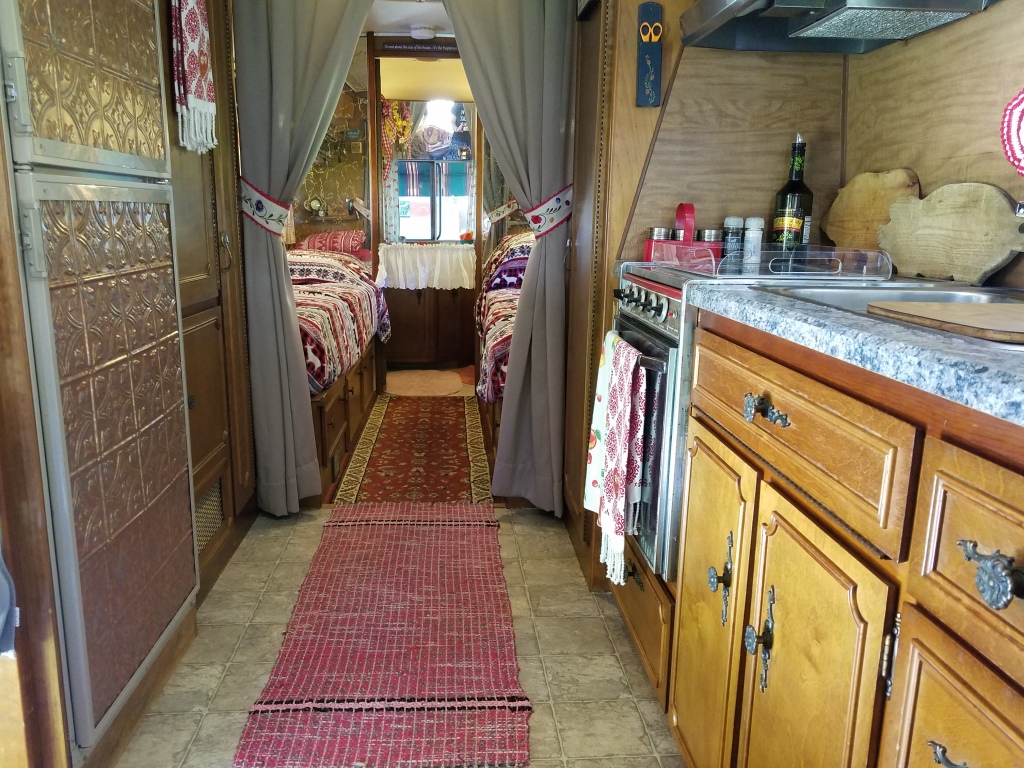
Our 1987 “forever” Avion- Model 32S
- Click here to visit our YouTube Video Library on projects we have done on our Avion!
- Redid all window trim, upgraded suspension to a MORryde Independent Suspension system with new axels & brake system
- Replaced black tank, expanded rear bumper with storage for sewer hoses/fittings, created a “swinging” bathroom wall
- Replaced water lines with PEX tubing, Installed 600 AMP hour Battleborn Battery system with many system upgrades to the electrical system
- May 1-Nov 15, 2023 we logged 15,879 miles over 7 months traveling from upstate NY to SD to Canada to Alaska (3 mo) then back down through British Columbia, Canada and along the entire west coast of the USA.


Our 1973 Avion- 28′ LaGrande model
- Our YouTube Library of videos of our ’73
- Redid all window trim (glass bead) and replaced window crank actuators
- Installed new fuse box and inverter
- Repaired vent fan screens and installed new plastic shrouds
- Changed out prior owner’s retrofit dinette and replaced with new sofa area
- We owned this Avion from Sept. 2016 to April 2020. During those years we traveled the east coast from Massachusetts to South Carolina on vacation trips logging over 12,000 miles in four years.
Please visit our YouTube Channel and our Video Library on projects, how-to tips and much more!
Watch, Read, Listen:
Our blog articles in chronological order starting from most recent…
Join 900+ subscribers
Stay in the loop with everything you need to know.
